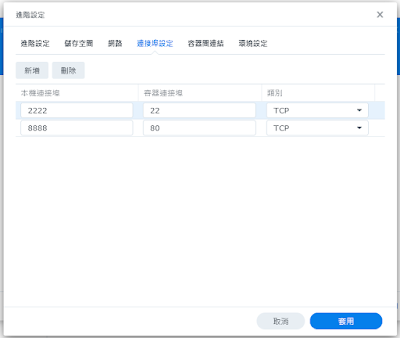
但因為port數量有限制
想說從linux上來處理
找到
daemonlogger
還滿方便的
daemonlogger -i eth1 -o eth2 -d
如果是proxmox 在 guest 設定沒用
要在host上設定
有個guest在備分時偶爾會出現以下的錯誤
怪的狀況不是每天
而是不定時會發生

109: 2021-11-01 23:34:40 INFO: Starting Backup of VM 109 (qemu)
109: 2021-11-01 23:34:40 INFO: status = running
109: 2021-11-01 23:34:40 INFO: VM Name: 0.226-examtest
109: 2021-11-01 23:34:40 INFO: include disk 'virtio0' 'nfs218_system:109/vm-109-disk-0.qcow2' 100G
109: 2021-11-01 23:34:40 INFO: backup mode: snapshot
109: 2021-11-01 23:34:40 INFO: ionice priority: 7
109: 2021-11-01 23:34:40 INFO: creating Proxmox Backup Server archive 'vm/109/2021-11-01T15:34:40Z'
109: 2021-11-01 23:34:41 INFO: started backup task '2ba8928b-bd3b-4e90-a62f-7fd1a37d51d8'
109: 2021-11-01 23:34:41 INFO: resuming VM again
109: 2021-11-01 23:34:44 ERROR: VM 109 qmp command 'cont' failed - got timeout
109: 2021-11-01 23:34:44 INFO: aborting backup job
109: 2021-11-01 23:34:44 INFO: resuming VM again
109: 2021-11-01 23:34:44 ERROR: Backup of VM 109 failed - VM 109 qmp command 'cont' failed - got timeout
proxmox更新到7版後
在管理介面 mount nfs 可以選 v3 或 v4

用fio測一下 v3 和 v4 的效能差別
config 如下
# This job file tries to mimic the Intel IOMeter File Server Access Pattern
[global]
description=Emulation of Intel IOmeter File Server Access Pattern
[iometer]
bssplit=512/10:1k/5:2k/5:4k/60:8k/2:16k/4:32k/4:64k/10
filename=PhysicalDrive1:PhysicalDrive2:PhysicalDrive3
size=10G
rw=randrw
#set read 50% write 50%
rwmixread=50
direct=1
runtime=60
# IOMeter defines the server loads as the following:
# iodepth=1 Linear
# iodepth=4 Very Light
# iodepth=8 Light
# iodepth=64 Moderate
# iodepth=256 Heavy
iodepth=64
測三次 取最後一次的值如下
nfs v4
iometer: (g=0): rw=randrw, bs=(R) 512B-64.0KiB, (W) 512B-64.0KiB, (T) 512B-64.0KiB, ioengine=psync, iodepth=64
fio-3.25
Starting 1 process
Jobs: 1 (f=3): [m(1)][100.0%][r=168KiB/s,w=107KiB/s][r=11,w=12 IOPS][eta 00m:00s]
iometer: (groupid=0, jobs=1): err= 0: pid=2342174: Sun Oct 31 07:28:44 2021
Description : [Emulation of Intel IOmeter File Server Access Pattern]
read: IOPS=55, BW=610KiB/s (625kB/s)(35.7MiB/60016msec)
clat (usec): min=430, max=339828, avg=10019.94, stdev=13081.64
lat (usec): min=431, max=339828, avg=10020.43, stdev=13081.64
clat percentiles (usec):
| 1.00th=[ 775], 5.00th=[ 3228], 10.00th=[ 4015], 20.00th=[ 5473],
| 30.00th=[ 6587], 40.00th=[ 7832], 50.00th=[ 9110], 60.00th=[ 10159],
| 70.00th=[ 11338], 80.00th=[ 12387], 90.00th=[ 13304], 95.00th=[ 14222],
| 99.00th=[ 43254], 99.50th=[ 99091], 99.90th=[208667], 99.95th=[299893],
| 99.99th=[341836]
bw ( KiB/s): min= 72, max= 1180, per=100.00%, avg=613.90, stdev=270.71, samples=119
iops : min= 8, max= 90, avg=56.03, stdev=18.14, samples=119
write: IOPS=57, BW=592KiB/s (606kB/s)(34.7MiB/60016msec); 0 zone resets
clat (usec): min=316, max=218978, avg=7624.96, stdev=11376.82
lat (usec): min=316, max=218979, avg=7626.12, stdev=11376.98
clat percentiles (usec):
| 1.00th=[ 400], 5.00th=[ 457], 10.00th=[ 490], 20.00th=[ 586],
| 30.00th=[ 1172], 40.00th=[ 4113], 50.00th=[ 6128], 60.00th=[ 8094],
| 70.00th=[ 10028], 80.00th=[ 11994], 90.00th=[ 13960], 95.00th=[ 18482],
| 99.00th=[ 37487], 99.50th=[ 85459], 99.90th=[152044], 99.95th=[212861],
| 99.99th=[219153]
bw ( KiB/s): min= 18, max= 1278, per=100.00%, avg=595.21, stdev=271.81, samples=119
iops : min= 6, max= 106, avg=58.24, stdev=19.98, samples=119
lat (usec) : 500=6.12%, 750=8.19%, 1000=1.17%
lat (msec) : 2=1.67%, 4=7.70%, 10=39.02%, 20=33.10%, 50=2.17%
lat (msec) : 100=0.41%, 250=0.41%, 500=0.03%
cpu : usr=0.16%, sys=0.57%, ctx=6838, majf=0, minf=14
IO depths : 1=100.0%, 2=0.0%, 4=0.0%, 8=0.0%, 16=0.0%, 32=0.0%, >=64=0.0%
submit : 0=0.0%, 4=100.0%, 8=0.0%, 16=0.0%, 32=0.0%, 64=0.0%, >=64=0.0%
complete : 0=0.0%, 4=100.0%, 8=0.0%, 16=0.0%, 32=0.0%, 64=0.0%, >=64=0.0%
issued rwts: total=3339,3476,0,0 short=0,0,0,0 dropped=0,0,0,0
latency : target=0, window=0, percentile=100.00%, depth=64
Run status group 0 (all jobs):
READ: bw=610KiB/s (625kB/s), 610KiB/s-610KiB/s (625kB/s-625kB/s), io=35.7MiB (37.5MB), run=60016-60016msec
WRITE: bw=592KiB/s (606kB/s), 592KiB/s-592KiB/s (606kB/s-606kB/s), io=34.7MiB (36.4MB), run=60016-60016msec
nfs v3
iometer: (g=0): rw=randrw, bs=(R) 512B-64.0KiB, (W) 512B-64.0KiB, (T) 512B-64.0KiB, ioengine=psync, iodepth=64
fio-3.25
Starting 1 process
Jobs: 1 (f=3): [m(1)][100.0%][r=581KiB/s,w=609KiB/s][r=51,w=42 IOPS][eta 00m:00s]
iometer: (groupid=0, jobs=1): err= 0: pid=2347167: Sun Oct 31 07:35:09 2021
Description : [Emulation of Intel IOmeter File Server Access Pattern]
read: IOPS=49, BW=548KiB/s (561kB/s)(32.1MiB/60012msec)
clat (usec): min=394, max=285769, avg=9756.36, stdev=10269.42
lat (usec): min=394, max=285770, avg=9756.86, stdev=10269.42
clat percentiles (usec):
| 1.00th=[ 889], 5.00th=[ 3294], 10.00th=[ 4113], 20.00th=[ 5407],
| 30.00th=[ 6718], 40.00th=[ 7898], 50.00th=[ 8979], 60.00th=[ 10290],
| 70.00th=[ 11338], 80.00th=[ 12387], 90.00th=[ 13435], 95.00th=[ 14484],
| 99.00th=[ 30278], 99.50th=[ 56361], 99.90th=[206570], 99.95th=[233833],
| 99.99th=[287310]
bw ( KiB/s): min= 8, max= 1118, per=100.00%, avg=548.19, stdev=256.60, samples=119
iops : min= 2, max= 86, avg=49.50, stdev=15.73, samples=119
write: IOPS=51, BW=522KiB/s (534kB/s)(30.6MiB/60012msec); 0 zone resets
clat (usec): min=357, max=221586, avg=10035.07, stdev=12250.59
lat (usec): min=358, max=221587, avg=10036.14, stdev=12250.75
clat percentiles (usec):
| 1.00th=[ 482], 5.00th=[ 627], 10.00th=[ 1172], 20.00th=[ 4146],
| 30.00th=[ 5735], 40.00th=[ 7111], 50.00th=[ 8586], 60.00th=[ 10159],
| 70.00th=[ 11600], 80.00th=[ 13042], 90.00th=[ 16188], 95.00th=[ 21103],
| 99.00th=[ 47449], 99.50th=[ 93848], 99.90th=[168821], 99.95th=[196084],
| 99.99th=[221250]
bw ( KiB/s): min= 34, max= 1039, per=100.00%, avg=523.79, stdev=223.74, samples=119
iops : min= 6, max= 82, avg=51.63, stdev=15.50, samples=119
lat (usec) : 500=0.73%, 750=4.03%, 1000=0.87%
lat (msec) : 2=0.71%, 4=7.69%, 10=44.35%, 20=37.52%, 50=3.37%
lat (msec) : 100=0.38%, 250=0.33%, 500=0.02%
cpu : usr=0.25%, sys=0.59%, ctx=6076, majf=0, minf=15
IO depths : 1=100.0%, 2=0.0%, 4=0.0%, 8=0.0%, 16=0.0%, 32=0.0%, >=64=0.0%
submit : 0=0.0%, 4=100.0%, 8=0.0%, 16=0.0%, 32=0.0%, 64=0.0%, >=64=0.0%
complete : 0=0.0%, 4=100.0%, 8=0.0%, 16=0.0%, 32=0.0%, 64=0.0%, >=64=0.0%
issued rwts: total=2968,3090,0,0 short=0,0,0,0 dropped=0,0,0,0
latency : target=0, window=0, percentile=100.00%, depth=64
Run status group 0 (all jobs):
READ: bw=548KiB/s (561kB/s), 548KiB/s-548KiB/s (561kB/s-561kB/s), io=32.1MiB (33.7MB), run=60012-60012msec
WRITE: bw=522KiB/s (534kB/s), 522KiB/s-522KiB/s (534kB/s-534kB/s), io=30.6MiB (32.1MB), run=60012-60012msec
初步看起來 v4 稍微好一些
最近有個朋友問到如何用python走rest api 撈graylog的資料
因為一直以來都是用curl
沒用python
今天朋友說他試出來了 感謝他的分享
做個記錄
程式碼如下
import requests
user = 'admin'
pw = 'pwd'
send_format_date_from = '2021-10-21T16:00:00.000Z'
send_format_date_to = '2021-10-21T17:00:00.000Z'
str = 'search key word'
url='http://graylog_ip:9000/api/views/search/messages'
header = {'Accept':'text/csv,application/json', 'Content-Type':'application/json', 'X-Requested-By':'cli'}
#以下是使用絶對時間的語法 上方已定義區間
graylog_send_data={ "streams":["000000000000000000000001"], "timerange":[ "absolute",{ "from":send_format_date_from, "to":send_format_date_to } ], "query_string":{ "type":"elasticsearch", "query_string":str } }
#以下是使用相對時間的語法 range 是以秒為單位
graylog_send_data={ "streams":["000000000000000000000001"], "timerange":{ "type":"relative","range":60 }, "query_string":{ "type":"elasticsearch", "query_string":str } }
r = requests.post(url, auth=(user, pw), headers=header, json=graylog_send_data)
print(r.text)
相對時間或絶對時間擇一使用
升到 promox 7 後
有几台guest都出現了以下的問題

可是使用 badblocks xfs_repair 進行檢查
都沒有發現任何錯誤
而且看了一下nas各個HD的資訊
也沒有發現任何狀況
還在找原因
之前有一台是發生在swap 區
目前把swap 關掉
然後把 ram 從2G調到 4G
觀察到現在沒有異常
不知道是不是ram 的問題
2021/10/24 更新
發生狀況的有四台几器 共同的情況是這些guest的io都很大
分別處理如下
ntopng因為升版後 system id 變了 所以移至 LXC 後 重新要了新key
librenms 下載了新版的vm 把資料移轉到新几器上
https://docs.librenms.org/Support/FAQ/#how-do-i-move-my-librenms-install-to-another-server
剩下cacti 跟 syslog
從log來看是 write 時候的問題
目前所有的guest hd 預設都是使用 no cache
想說會不會是效能的問題
https://adminkk.blogspot.com/2016/05/wsus-proxmox-winmount-nfs-wsus-iscsi.html
於是把上面二台
一台調成 write back
一台調成 write through
到目前跑了二天
持續觀察中
在synology的nas裝好 pbs後
要更新出現以下的錯誤
Err:4 http://download.proxmox.com/debian/pbs bullseye InRelease
The following signatures couldn't be verified because the public key is not available: NO_PUBKEY DD4BA3917E23BF59
Reading package lists... Done
W: GPG error: http://download.proxmox.com/debian/pbs bullseye InRelease: The following signatures couldn't be verified because the public key is not available: NO_PUBKEY DD4BA3917E23BF59
E: The repository 'http://download.proxmox.com/debian/pbs bullseye InRelease' is not signed.
N: Updating from such a repository can't be done securely, and is therefore disabled by default.
N: See apt-secure(8) manpage for repository creation and user configuration details.
應該是GPG key 沒有裝
以下指令安裝
wget https://enterprise.proxmox.com/debian/proxmox-release-bullseye.gpg -O /etc/apt/trusted.gpg.d/proxmox-release-bullseye.gpg
再update就沒問題了
https://pve.proxmox.com/wiki/Install_Proxmox_VE_on_Debian_11_Bullseye#Install_Proxmox_VE
今天有個user拿了一片DVD來
說要給其他看看
本來想說直接把檔案丟到google drive share出去就好
結果有保護
想說轉成MP4好了
試了很多軟体 最後 HandBrake 成功了
參考以下連結
https://ephrain.net/ubuntu-%E4%BD%BF%E7%94%A8-handbrake-%E5%B0%87-dvd-%E8%BD%89%E6%88%90-mp4/
今天在docker 安裝完pbs後要更新出現以下的錯誤
Hit:1 http://deb.debian.org/debian bullseye InRelease
Hit:2 http://security.debian.org/debian-security bullseye-security InRelease
Hit:3 http://deb.debian.org/debian bullseye-updates InRelease
Get:4 http://download.proxmox.com/debian/pbs bullseye InRelease [3067 B]
Err:4 http://download.proxmox.com/debian/pbs bullseye InRelease
The following signatures couldn't be verified because the public key is not available: NO_PUBKEY DD4BA3917E23BF59
Reading package lists... Done
W: GPG error: http://download.proxmox.com/debian/pbs bullseye InRelease: The following signatures couldn't be verified because the public key is not available: NO_PUBKEY DD4BA3917E23BF59
E: The repository 'http://download.proxmox.com/debian/pbs bullseye InRelease' is not signed.
N: Updating from such a repository can't be done securely, and is therefore disabled by default.
N: See apt-secure(8) manpage for repository creation and user configuration details.
解決方法如下
wget https://enterprise.proxmox.com/debian/proxmox-release-bullseye.gpg -O /etc/apt/trusted.gpg.d/proxmox-release-bullseye.gpg
https://pve.proxmox.com/wiki/Install_Proxmox_VE_on_Debian_11_Bullseye#Install_Proxmox_VE
https://forum.proxmox.com/threads/problem-with-repository-and-upgrade.95020/
在ubuntu 設定 apache2 的SSL
安裝OpenSSL
sudo apt install openssl
啟用Apache2的SSL模組
sudo a2enmod ssl
把憑証放到以下目錄
/etc/pki/tls/certs
修改
/etc/apache2/sites-available/default-ssl.conf
SSLCertificateFile /etc/pki/tls/certs/server.cer
SSLCertificateKeyFile /etc/pki/tls/certs/server.key
cd /etc/apache2/sites-enabled
ln -s ../sites-available/default-ssl.conf
systemctl restart apache2
https://20.65.210.123/index.php/2021/05/12/ubuntu-apache-ssl/
最近要求要把所有的網站改成 https
以 centos 7 apache 為例
首先取得憑証
因為單位有買整個domain的
所以直接拿來用
把憑証放到以下目錄
/etc/pki/tls/certs
安裝 mod_ssl
$ yum -y install mod_ssl
$ vi /etc/httpd/conf.d/ssl.conf
修改以下二行
SSLCertificateFile /etc/pki/tls/certs/server.cer
SSLCertificateKeyFile /etc/pki/tls/certs/server.key
重新啟動 Apache
$ systemctl restart httpd.service
若使用nginx
修改 /etc/nginx/nginx.conf 加入以下藍色設定
server {
listen 80 default_server;
listen [::]:80 default_server;
# 加入 SSL 設定
listen 443 ssl default_server;
listen [::]:443 ssl default_server;
# 憑證與金鑰的路徑
ssl_certificate /etc/pki/tls/certs/server.cer;
ssl_certificate_key /etc/pki/tls/certs/server.key;
# ...
}
systemctl restart nginx
https://blog.gtwang.org/linux/nginx-create-and-install-ssl-certificate-on-ubuntu-linux/
proxmox 升到7後
LXC的 Centos 7 無法開机 出現以下錯誤
WARN: old systemd (< v232) detected, container won't run in a pure cgroupv2 environment! Please see documentation -> container -> cgroup version.
TASK WARNINGS: 1
解決方法如下
vi /etc/default/grub
I changed this line from,
GRUB_CMDLINE_LINUX_DEFAULT="quiet"
to
GRUB_CMDLINE_LINUX_DEFAULT="systemd.unified_cgroup_hierarchy=0 quiet"
更新grub
update-grub
重開機
https://pve.proxmox.com/pve-docs/chapter-sysadmin.html#sysboot_edit_kernel_cmdline
https://pve.proxmox.com/wiki/Upgrade_from_6.x_to_7.0#Old_Container_and_CGroupv2
https://pve.proxmox.com/pve-docs/chapter-pct.html#pct_cgroup_compat
https://forum.proxmox.com/threads/unified-cgroup-v2-layout-upgrade-warning-pve-6-4-to-7-0.92459/
記錄一下在 ubuntu 20.04 (LXC) 安裝nfsen
OS布署完成後先update
apt update
apt upgrade -y
再來修改時區
timedatectl set-timezone Asia/Taipei
安裝所需 package
apt install -y nfdump rrdtool librrd-dev librrds-perl librrdp-perl libpcap-dev php php-common libsocket6-perl apache2 libapache2-mod-php libmailtools-perl libio-socket-ssl-perl
下載 nfsen
從官方下載的版本在安裝時會出現以下的 bug
Can't use string ("live") as a HASH ref while "strict refs" in use at libexec/NfProfile.pm line 1238.
因此從 https://github.com/p-alik/nfsen/releases/tag/nfsen-1.3.8 下載已修正版本
下載後解壓縮
cd nfsen-nfsen-1.3.8/etc
cp nfsen-dist.conf nfsen.conf
決定安裝路徑在 /opt/nfsen
修改 nfsen.conf
$BASEDIR = "/opt/nfsen";
$PREFIX = '/usr/bin/';
$USER = "www-data";
$WWWUSER = "www-data";
$WWWGROUP = "www-data";
%sources = ( 'upstream1' => {'port'=>'9995','col'=>'#0000ff','type'=>'netflow'}' );
mkdir /opt/nfsen
mkdir /var/www/html/nfsen
adduser netflow
安裝
./install.pl ./etc/nfsen.conf
出現
RRD version '1.7002' not yet supported!
需修改 libexec/NfSenRRD.pm 約在第 76 行 改成 ==> $rrd_version >= 1.2 && $rrd_version < 1.9
再執行一次
./install.pl ./etc/nfsen.conf
啟動
/opt/nfsen/bin/nfsen start
設定開几啟動
cd /etc/systemd/system
ln -s /lib/systemd/system/rc-local.service
vi /etc/rc.local
#!/bin/sh -e
/usr/local/nfsen/bin/nfsen start
exit 0
chmod +x /etc/rc.local
設定開几不啟動nfdump 因為nfsen啟動時會自行呼叫
systemctl disable nfdump.service
重開几
設定 netflow 導到 udp 9995
打開 http://nfsen_ip/nfsen/nfsen.php 確認是否正常
https://sc8log.blogspot.com/2017/06/ubuntu-1604-netflow.html
https://github.com/p-alik/nfsen/releases/tag/nfsen-1.3.8
https://github.com/p-alik/nfsen/issues/1
https://zoomadmin.com/HowToInstall/UbuntuPackage/libsocket6-perl
proxmox 升到7後
centos 7 的 LXC 無法開几
出現以下訊息
WARN: old systemd (< v232) detected, container won't run in a pure cgroupv2 environment! Please see documentation -> container -> cgroup version.
以下連結提供解決方法
不過還是建議升級到centos 8
https://forum.proxmox.com/threads/unified-cgroup-v2-layout-upgrade-warning-pve-6-4-to-7-0.92459/
https://pve.proxmox.com/wiki/Upgrade_from_6.x_to_7.0#Old_Container_and_CGroupv2
https://pve.proxmox.com/pve-docs/chapter-pct.html#pct_cgroup_compat
在proxmox上的LXC一直有個問題 今天終於解決了
記錄一下
當部屬完LXC要更新時出現以下的情況
#dnf -y update
Extra Packages for Enterprise Linux 8 - Next - x86_64 0.0 B/s | 0 B 00:00
Errors during downloading metadata for repository 'epel-next':
- Curl error (6): Couldn't resolve host name for https://mirrors.fedoraproject.org/metalink?repo=epel-next-8&arch=x86_64&infra=stock&content=centos [Could not resolve host: mirrors.fedoraproject.org]
Error: Failed to download metadata for repo 'epel-next': Cannot prepare internal mirrorlist: Curl error (6): Couldn't resolve host name for https://mirrors.fedoraproject.org/metalink?repo=epel-next-8&arch=x86_64&infra=stock&content=centos [Could not resolve host: mirrors.fedoraproject.org]
檢查一下 /etc/resolv.conf
cat /etc/resolv.conf
# Generated by NetworkManager
search abc.com
發現沒有設定nameserver
可是這個值在佈署LXC時確實有輸入
後來發現可能是 NetworkManager 的問題
導致proxmox 要修改 /etc/resolv.conf 的時候出問題
本來是想直接用 NetworkManager 來處理
直接 nmtui
結果預設沒有安裝
只好再自己裝
# dnf install -y NetworkManager-tui
在 nmtui 裡設定好 nameserver 後重開
在 /etc/resolv.conf 裡還是沒看到 nameserver
手動把nameserver 加入/etc/resolv.conf 也沒用
重開後就會消失了
於是決定把 NetworkManager 停掉
# systemctl stop NetworkManager.service
# systemctl disable NetworkManager.service
再安裝使用 network-scripts
# dnf install -y network-scripts
# systemctl enable network
改完後重開
再看一下 /etc/resolv.conf
# cat /etc/resolv.conf
# --- BEGIN PVE ---
search abc.com
nameserver 8.8.8.8
# --- END PVE ---
醬就正常了
https://forum.proxmox.com/threads/proxmox-6-0-9-dns-host-settings-reset-every-time.59434/
https://www.thegeekdiary.com/how-to-disable-networkmanager-in-centos-rhel-8/
網路上可以找到一些m3u8 的列表
所以今天試著在linux上直接播放 m3u8 的檔案
本來是想用VLC
但VLC載入播放清單檔時如果連不上會一直跳錯誤訊息
後來找到 smplayer
直接 開啟 檔案 載入 m3u8的列表檔後
就可以打開play list 來選擇想看的來源
很方便
https://mobileai.net/2021/07/21/twm3u80721
https://stackoverflow.com/questions/38906626/curl-to-return-http-status-code-along-with-the-response
今天在把raspberry 4 接到電視時
碰到聲音無法從hdmi輸出的問題
找了很多文件
試了三個OS版本
最後是使用 linux mate 才處理好
因為在音訊設定上可以直接選擇hdmi輸出
但選完後每次重開几就要再重新手動設定一次 有點麻煩
為了解決這個問題
在手動設定好後
執行以下指定
pactl list short sinks
找出目前使用的是那個輸出
找到後
接下來再開几啟動的設定加上一個開几指定音訊輸出的指令
pactl set-default-sink alsa_output.platform-bcm2835_audio.stereo-fallback
這樣每次重開就會自動重新指定音訊到hdmi輸出了
https://www.youtube.com/watch?v=XFNeLzfGB-o
https://www.upressme.xyz/how-to-fix-sound-in-ubuntu/
今天利用API試著從 twse 撈出資料
curl https://mis.twse.com.tw/stock/api/getStockInfo.jsp?ex_ch=tse_0056.tw|jq
{
"msgArray": [
{
"tv": "-",
"ps": "-",
"nu": "http://www.yuantaetfs.com/#/RtNav/Index",
"pz": "-",
"bp": "0",
"a": "34.3800_34.3900_34.4000_34.4100_34.4200_",
"b": "34.3700_34.3600_34.3500_34.3400_34.3300_",
"c": "0056",
"d": "20210714",
"ch": "0056.tw",
"tlong": "1626229079000",
"f": "446_1402_1414_406_48_",
"ip": "0",
"g": "70_209_677_95_78_",
"mt": "848857",
"h": "34.9000",
"it": "02",
"l": "34.3500",
"n": "元大高股息",
"o": "34.8900",
"p": "0",
"ex": "tse",
"s": "-",
"t": "10:17:59",
"u": "38.3300",
"v": "14561",
"w": "31.3700",
"nf": "元大臺灣高股息證券投資信託基金",
"y": "34.8500",
"z": "-",
"ts": "0"
}
],
"referer": "",
"userDelay": 5000,
"rtcode": "0000",
"queryTime": {
"sysDate": "20210714",
"stockInfoItem": 901,
"stockInfo": 188897,
"sessionStr": "UserSession",
"sysTime": "10:18:03",
"showChart": false,
"sessionFromTime": -1,
"sessionLatestTime": -1
},
"rtmessage": "OK",
"exKey": "if_tse_0056.tw_zh-tw.null",
"cachedAlive": 82099
}
如果要取得msgArray裡的資料
指令如下
curl https://mis.twse.com.tw/stock/api/getStockInfo.jsp?ex_ch=tse_00882.tw|jq '.msgArray'
[
{
"tv": "-",
"ps": "-",
"nu": "https://www.ctbcinvestments.com/Product/ETFBusiness",
"pz": "-",
"bp": "0",
"a": "15.4100_15.4200_15.4300_15.4400_15.4500_",
"b": "15.4000_15.3900_15.3800_15.3700_15.3600_",
"c": "00882",
"d": "20210714",
"ch": "00882.tw",
"tlong": "1626229529000",
"f": "1005_1039_946_454_514_",
"ip": "0",
"g": "3086_873_1726_575_596_",
"mt": "353051",
"h": "15.4300",
"it": "02",
"l": "15.4000",
"n": "中信中國高股息",
"o": "15.4300",
"p": "0",
"ex": "tse",
"s": "-",
"t": "10:25:29",
"u": "9999.9500",
"v": "17761",
"nf": "中國信託全球收益ETF傘型證券投資信託基金之中國信託恒生中國高股息ETF證券投資信託基金",
"y": "15.4500",
"z": "-",
"ts": "0"
}
]
再來要報得目前的即時報價 在 "a" 這個欄位 這裡花了一點時間試
因為上一步的資料裡多了中括號 [ ]
所以指令要改成如下
curl https://mis.twse.com.tw/stock/api/getStockInfo.jsp?ex_ch=tse_0056.tw|jq '.msgArray[].a'
"34.3700_34.3800_34.3900_34.4000_34.4100_"
第一個分隔就是目前報價
之前一直都是使用nc來把crystal diskinfo收集到的資料傳到syslog
但nc 一直有個問題就是會被大多數的防毒軟体判斷為惡意程式
今天又要crystal diskinfo 更新
想說再來找看看有沒有其他的替代工具
結果發現了 swiss file knife
超強的
重點是不會被防毒FP
記一下把檔案傳到 syslog的語法
type diskinfo.txt | sfk.exe tonetlog 10.0.0.1:514
其他的功能有用到再來看
發現一個問題
sfk tonetlog 最多只能傳送 1500 byte
所以diskinfo.txt會被截斷
先改回來nc
http://stahlworks.com/dev/swiss-file-knife.html
https://sourceforge.net/projects/swissfileknife/
安裝jitsi的流程記錄一下 ubuntu 20.04
os安裝好後
apt update
apt upgrade -y
在DNS上設定好server的name
接下來
apt install curl gnupg
curl https://download.jitsi.org/jitsi-key.gpg.key | sudo sh -c 'gpg --dearmor > /usr/share/keyrings/jitsi-keyring.gpg'
echo 'deb [signed-by=/usr/share/keyrings/jitsi-keyring.gpg] https://download.jitsi.org stable/' | sudo tee /etc/apt/sources.list.d/jitsi-stable.list > /dev/null
sudo apt-get -y update
sudo apt-get -y install jitsi-meet
如果要使用letsencrypt
apt install certbot
/usr/share/jitsi-meet/scripts/install-letsencrypt-cert.sh
重啟nginx
到 https://servername
就可以使用了
letsencrypt要記得每三個月renew一次
或使用crontab
1 1 * * 6 /usr/bin/certbot renew
https://kafeiou.pw/2020/06/19/2489/
https://campus-xoops.tn.edu.tw/modules/tad_book3/page.php?tbdsn=1557
架完jitsi後
預設是完全開放
因為不可能使用ip來管制
所以想用ldap
找了很多文件
發現nginx可以利用轉導的方式來認証
就不用再有一堆安裝及設定
server {
listen 443 ssl;
listen [::]:443 ssl;
server_name meet;
location / {
auth_request /auth;
try_files $uri $uri/ =404;
}
location = /auth {
proxy_pass http://10.0.0.1/auth/;
proxy_pass_request_body off;
proxy_set_header Content-Length "";
proxy_set_header X-Original-URI $request_uri;
}
}
藍字部分加在原來的nginx config裡
紅字部分則是視需要轉導到原來已設定好ldap認証的server及路徑
改好後重啟 nginx
今天打開librenms的時候發現無法進入
出現錯誤訊息

查了一下log 發現 5/30 03:00左右就出問題了
重開後正常
但跑了一下valid.php出現以下錯誤
./validate.php
====================================
Component | Version
--------- | -------
LibreNMS | 21.5.1-16-g15da7fa
DB Schema | 2020_12_14_091314_create_port_group_port_table (205)
PHP | 7.4.19
Python | 3.6.8
MySQL | 5.5.68-MariaDB
RRDTool | 1.4.8
SNMP | NET-SNMP 5.7.2
====================================
[OK] Composer Version: 2.0.14
[OK] Dependencies up-to-date.
[OK] Database connection successful
[FAIL] MariaDB version 10.2.2 is the minimum supported version as of March, 2021. Update MariaDB to a supported version 10.5 suggested).
[FAIL] Your database is out of date!
[FIX]:
./lnms migrate
[WARN] Global lnms shortcut not installed. lnms command must be run with full path
[FIX]:
sudo ln -s /opt/librenms/lnms /usr/bin/lnms
[WARN] Bash completion not installed. lnms command tab completion unavailable.
[FIX]:
sudo cp /opt/librenms/misc/lnms-completion.bash /etc/bash_completion.d/
[WARN] Log rotation not enabled, could cause disk space issues
[FIX]:
sudo cp /opt/librenms/misc/librenms.logrotate /etc/logrotate.d/librenms
[WARN] Your install is over 24 hours out of date, last update: Sat, 29 May 2021 14:08:28 +0000
[FIX]:
Make sure your daily.sh cron is running and run ./daily.sh by hand to see if there are any errors.
[FAIL] We have found some files that are owned by a different user than 'librenms', this will stop you updating automatically and / or rrd files being updated causing graphs to fail.
[FIX]:
sudo chown -R librenms:librenms /opt/librenms
sudo setfacl -d -m g::rwx /opt/librenms/rrd /opt/librenms/logs /opt/librenms/bootstrap/cache/ /opt/librenms/storage/
sudo chmod -R ug=rwX /opt/librenms/rrd /opt/librenms/logs /opt/librenms/bootstrap/cache/ /opt/librenms/storage/
Files:
/opt/librenms/config.php_20201107
/opt/librenms/html/plugins/Weathermap/nkhc.png
/opt/librenms/html/plugins/Weathermap/nkhc.html
./lnms migrate
Migrating: 2020_12_14_091314_create_port_groups_table
In Connection.php line 678:
SQLSTATE[42S01]: Base table or view already exists: 1050 Table ‘port_groups’ already exists (SQL: create table port_groups (id int unsi
gned not null auto_increment primary key, name varchar(255) not null, desc varchar(255) null) default character set utf8mb4 collate ‘ut
f8mb4_unicode_ci’)
In Exception.php line 18:
SQLSTATE[42S01]: Base table or view already exists: 1050 Table ‘port_groups’ already exists
In PDOStatement.php line 112:
SQLSTATE[42S01]: Base table or view already exists: 1050 Table ‘port_groups’ already exists
進DB先把 port_groups drop 掉
再跑一次
./lnms migrate
https://www.opencli.com/mysql/rhel-centos7-upgrade-mariadb-to-10-5
之前的直播都是直接上youtube
今天有個需求 希望能夠不要使用youtube
而且user要能直接用browser看 不需要 vlc
因為之前上看校的直播使用的是 rtmp
查了一下資料
如果要在browser用rtmp
使用的播放程式都必需轉成flash
問題是現在沒有browser支援flash了
所以想到另一個方式
先把串流轉成hls (m3u8)的格式
在srs.conf 裡進行如下的修改
vhost __defaultVhost__ {
hls {
enabled on;
hls_path /usr/local/srs/objs/nginx/html/; (此行依現況調整)
hls_fragment 10;
hls_window 60;
}
}
改完重啟 並進行串流後
會在html生成live目錄及相關的m3u8文件
在client端目前看來只有 safari 能直接在html5 使用 <video> 播放
其他browser都需要再呼叫播放器
參考以下範例
<html>
<head>
<link href="https://vjs.zencdn.net/7.4.1/video-js.css" rel="stylesheet">
</head>
<body>
<video id='my-video' class='video-js' controls preload='auto' width='800' height='600' poster='avatar-poster.jpg'
data-setup='{ "html5" : { "nativeTextTracks" : true } }'>
<source src='http://1.2.3.4:8080/live/livestream.m3u8' type="application/x-mpegURL">
<p class='vjs-no-js'>
To view this video please enable JavaScript, and consider upgrading to a web browser that
<a href='https://videojs.com/html5-video-support/' target='_blank'>supports HTML5 video</a>
</p>
</video>
<script src='https://vjs.zencdn.net/7.4.1/video.js'></script>
<script src="https://cdnjs.cloudflare.com/ajax/libs/videojs-contrib-hls/5.15.0/videojs-contrib-hls.min.js"></script>
<script>
var player = videojs('my-video');
player.play();
</script>
</body>
</html>
如果不使用直播而是想播放檔案
就要先把 mp4 轉成 hls
指令如下
ffmpeg -i video.mp4 -codec: copy -start_number 0 -hls_time 15 -hls_list_size 0 -f hls video.m3u8
接下來再依照上述的html範例進行修改
https://caniuse.com/http-live-streaming
https://blog.csdn.net/weixin_40592935/article/details/109361642
本來是想在synology直接使用loki的docker
但碰到的問題是docker如果升級時資料會遺失
看來這是所有docker的問題
除非可以在docker裡直接升級而不必重新下載
目前就直接安裝一台 oracle linux 8 直接跑執行檔
記得 loki-local-config.yaml 有些參數要改
因為資料預設是放在 /tmp
我是直接 mkdir /loki 然後改成如下
auth_enabled: false
server:
http_listen_port: 3100
grpc_listen_port: 9096
ingester:
wal:
enabled: true
dir: /loki/wal
lifecycler:
address: 127.0.0.1
ring:
kvstore:
store: inmemory
replication_factor: 1
final_sleep: 0s
chunk_idle_period: 1h # Any chunk not receiving new logs in this time will be flushed
max_chunk_age: 1h # All chunks will be flushed when they hit this age, default is 1h
chunk_target_size: 1048576 # Loki will attempt to build chunks up to 1.5MB, flushing first if chunk_idle_period or max_chunk_age is reached first
chunk_retain_period: 30s # Must be greater than index read cache TTL if using an index cache (Default index read cache TTL is 5m)
max_transfer_retries: 0 # Chunk transfers disabled
schema_config:
configs:
- from: 2020-10-24
store: boltdb-shipper
object_store: filesystem
schema: v11
index:
prefix: index_
period: 24h
storage_config:
boltdb_shipper:
active_index_directory: /loki/boltdb-shipper-active
cache_location: /loki/boltdb-shipper-cache
cache_ttl: 24h # Can be increased for faster performance over longer query periods, uses more disk space
shared_store: filesystem
filesystem:
directory: /loki/chunks
compactor:
working_directory: /loki/boltdb-shipper-compactor
shared_store: filesystem
limits_config:
reject_old_samples: true
reject_old_samples_max_age: 168h
chunk_store_config:
max_look_back_period: 0s
table_manager:
retention_deletes_enabled: false
retention_period: 0s
ruler:
storage:
type: local
local:
directory: /loki/rules
rule_path: /loki/rules-temp
alertmanager_url: http://localhost:9093
ring:
kvstore:
store: inmemory
enable_api: true
最近在試grafana的loki
這個專案已經釋出有一段時間了
只是一直沒去試
這几天試了一下
發現還不錯
如果沒有太複雜的需求
是一個不錯的選擇
稍微簡單說一下
目前在github上可以看到相關的程式有4個
logcli
command line 搜尋工具
如果不想用這個工具 也可以直接使用curl
curl -G -s "http://10.0.0.1:3100/loki/api/v1/query_range" --data-urlencode 'query={job="abc"}' --data-urlencode 'step=3000'|jq
loki-canary
效能檢視工具
loki
主程式
promtail
把資料拋回loki的client程式
最簡單的方式就是直接執行
loki 跟 promtail這二支程式
完全不需要安裝
在執行前注意要先把二個yaml檔定義好
loki 如果使用預設的yaml 要記得修改資料存放的路徑 預設是放在 /tmp
promtail預設收log file的路徑要記得改 如果有多個檔案要收
記得要增加如藍色的那段
scrape_configs:
- job_name: system
static_configs:
- targets:
- localhost
labels:
job: varlogs
__path__: /var/log/*
- targets:
- localhost
labels:
job: nginxlogs
__path__: /var/log/nginx/*
如果想使用網頁介面進行搜尋
就可以在grafana進行設定
https://grafana.com/docs/loki/latest/overview/
以往如果需要解壓後執行批次檔時
都是先壓成7z再利用7zsfx二次處理
今天發現 bandizip 可以直接壓成自解解檔達成以上的需求
但有個問題就是自解檔執行後會跳出詢問視窗 而且預設無法關掉
找了一下forum
在執行時加上 /auto就可以解決這個問題
例如
abc.exe /auto
2024/3/3 後記
可以用批次檔處理這個問題
run.bat 內容如下
curl -o %tmp%\abc.exe http://10.0.0.1/abc.exe
start %tmp%\abc.exe /auto
https://www.azofreeware.com/2012/07/7-zip-sfx-maker-32-7z.html
https://groups.google.com/g/bandizip-win/c/tS9KLKh45O8/m/spdej7MYAwAJ
最近google 發布消息
將從 2022/7 開始取消 學術單位硬碟的無限空間
搞得所有人 人仰馬翻
想說要怎麼搬資料
好在還有 one drive 1T 可以用
利用一直都在使用的 rclone 來處理了
這是免安裝純文字介面的工具
如果對文字介面有恐懼症的
可以試試
raidrive
不過免費版本有一些限制就是了
首先先到 https://rclone.org/ 下載檔案後解壓縮
第一次使用先執行 rclone config
建立新的 remote
要注意就算之前有建立過 時間久了憑証就會失效
要刪除再重新建立
建立過程請參考下方連結
https://zhuanlan.zhihu.com/p/139200172
再來列出几個常使用的指令範例
gd google drive
od one drive
把本机端的資料上傳到雲端上 並把過程進行記錄
./rclone -v copy ~/abc gd:/abc --log-file /tmp/0928.log
把雲端的資料下載到本地端 並把過程進行記錄
./rclone -v copy gd:/abc /tmp/abc --log-file /tmp/0928.log
把 gd 雲端的資料傳到 雲端 od 資料會先下載到本機再上傳
./rclone -v copy gd:/abc od:/abc --log-file /tmp/0928.log
如果需要在win 上mount 成一個磁碟機
要先安裝 winsfp
https://github.com/billziss-gh/winfsp/releases
再來打開dos 視窗 (絶對不能使用系統管理員模式)
建立一個cache 目錄
mkdir c:/tmp
執行掛載指令
rclone mount gd:/ z: --cache-dir c:\tmp
執行後dos 視窗不能關
不使用關掉dos視窗就會unmount 了