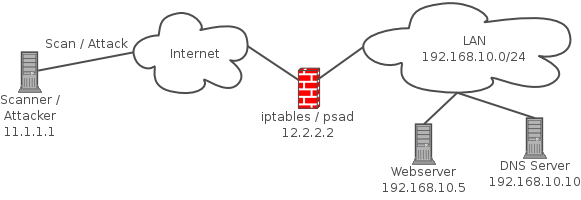
今天在確認nfcapd有沒有ipv6的資料時發現一個問題
nfdump時ipv6位址不完整
查了文件才知道 原來nfdump預設是會把ipv6省略表示的
如果要顯示完整ip
必須加上參數
-o long6
或
-o extended6
2016/10/27
在proxmox上裝完win10後發現一個問題
每次關機後開機一定要開二次
第一次一定會不正常關机
找了一下資料
發現應該是 Fast startup的問題
而且win10預設Fast startup 就是on
把她off後就正常了
https://www.reddit.com/r/Windows10/comments/3ixg13/windows_10_longer_boot_times_and_having_to_boot/
http://www.tenforums.com/tutorials/4189-fast-startup-turn-off-windows-10-a.html
每次關機後開機一定要開二次
第一次一定會不正常關机
找了一下資料
發現應該是 Fast startup的問題
而且win10預設Fast startup 就是on
把她off後就正常了
https://www.reddit.com/r/Windows10/comments/3ixg13/windows_10_longer_boot_times_and_having_to_boot/
http://www.tenforums.com/tutorials/4189-fast-startup-turn-off-windows-10-a.html
2016/10/08
為了安全
愈來愈多的網站都改用https的傳輸方式了
Let`s Encrypt提供了一個方便 自動而且免費的方式來達成這個需求
certbot幫助管理者方便的佈署
只要選擇使用的web server及os
就有完整的安裝方式
https://certbot.eff.org/
https://letsencrypt.org/
愈來愈多的網站都改用https的傳輸方式了
Let`s Encrypt提供了一個方便 自動而且免費的方式來達成這個需求
certbot幫助管理者方便的佈署
只要選擇使用的web server及os
就有完整的安裝方式
https://certbot.eff.org/
https://letsencrypt.org/
2016/10/04
之前不久proxmox上的backup出現問題
看了一下log
出現以下的訊息
Sep 13 00:01:57 proxmox78 kernel: [571754.499445] hpsa 0000:05:00.0: scsi 2:1:0:0: resetting logical Direct-Access HP LOGICAL VOLUME RAID-5 SSDSmartPathCap- En- Exp=1
Sep 13 00:02:08 proxmox78 kernel: [571766.276361] hpsa 0000:05:00.0: scsi 2:1:0:0: reset logical completed successfully Direct-Access HP LOGICAL VOLUME RAID-5 SSDSmartPathCap- En- Exp=1
Sep 13 00:05:57 proxmox78 kernel: [571994.368353] hpsa 0000:05:00.0: scsi 2:1:0:0: resetting logical Direct-Access HP LOGICAL VOLUME RAID-5 SSDSmartPathCap- En- Exp=1
Sep 13 00:06:09 proxmox78 kernel: [572007.128671] hpsa 0000:05:00.0: scsi 2:1:0:0: reset logical completed successfully Direct-Access HP LOGICAL VOLUME RAID-5 SSDSmartPathCap- En- Exp=1
再進到ilo去看後
發現以下的狀況
有HD出現smart error了
但面版上並沒有出現異常
也還是可以用
本想說應該不是出現reset的原因
但沒几天
另一台也出現同樣的問題
因為已經過保
也不打算修理
於是把其中一台關掉
把沒問題的HD拿到另一台試看看
到目前已經三週
沒有再出現問題
打電話去HP
HP回覆因為机器已經過保 無法回答問題
真是想罵人
看了一下log
出現以下的訊息
Sep 13 00:01:57 proxmox78 kernel: [571754.499445] hpsa 0000:05:00.0: scsi 2:1:0:0: resetting logical Direct-Access HP LOGICAL VOLUME RAID-5 SSDSmartPathCap- En- Exp=1
Sep 13 00:02:08 proxmox78 kernel: [571766.276361] hpsa 0000:05:00.0: scsi 2:1:0:0: reset logical completed successfully Direct-Access HP LOGICAL VOLUME RAID-5 SSDSmartPathCap- En- Exp=1
Sep 13 00:05:57 proxmox78 kernel: [571994.368353] hpsa 0000:05:00.0: scsi 2:1:0:0: resetting logical Direct-Access HP LOGICAL VOLUME RAID-5 SSDSmartPathCap- En- Exp=1
Sep 13 00:06:09 proxmox78 kernel: [572007.128671] hpsa 0000:05:00.0: scsi 2:1:0:0: reset logical completed successfully Direct-Access HP LOGICAL VOLUME RAID-5 SSDSmartPathCap- En- Exp=1
再進到ilo去看後
發現以下的狀況
有HD出現smart error了
但面版上並沒有出現異常
也還是可以用
本想說應該不是出現reset的原因
但沒几天
另一台也出現同樣的問題
因為已經過保
也不打算修理
於是把其中一台關掉
把沒問題的HD拿到另一台試看看
到目前已經三週
沒有再出現問題
打電話去HP
HP回覆因為机器已經過保 無法回答問題
真是想罵人
2016/08/12
一直以來在shell中都比較習慣使用cut來切割字串
但在log裡總是會碰到一個問題
就是在月份的單日會多一個空格
此時cut就會有問題
導致程式出狀況
awk就不會有這個問題
ex:
Aug 7 03:30:11 mail snmpd[2067]: Connection from UDP
Aug 12 08:30:10 mail snmpd[2067]: Connection from UDP
用cut和awk就會出現不同的結果
如下
cat ex |cut -d ' ' -f 3
7
08:30:10
cat ex |awk '{print $3}'
03:30:11
08:30:10
因此在取空格時 建議使用awk 比較不會有因空格造成的問題
2016/07/23
在某些情況下table內只能有一筆唯一的資料存在
而此時在insert時一般會先select看看存不存在
mysql提供了一個方便的語法
mysql INSERT ... ON DUPLICATE KEY UPDATE (新增或是更新一行完成)
必要條件:
1. 資料表中必須有 PRIMARY或UNIQUE的索引。
2. INSERT時須帶入1. 欄位的資料
SQL語法範例
INSERT INTO `gamePlayer` (`pNode`, `gsn`,`out`, `monster`, `club3`, `changecolor`) VALUES ('K',4, 100, -1, 0, 1) ON DUPLICATE KEY UPDATE `out`=100, `monster`=-1, `club3`=0, `changecolor`=1
http://note.tc.edu.tw/765.html
而此時在insert時一般會先select看看存不存在
mysql提供了一個方便的語法
mysql INSERT ... ON DUPLICATE KEY UPDATE (新增或是更新一行完成)
必要條件:
1. 資料表中必須有 PRIMARY或UNIQUE的索引。
2. INSERT時須帶入1. 欄位的資料
SQL語法範例
INSERT INTO `gamePlayer` (`pNode`, `gsn`,`out`, `monster`, `club3`, `changecolor`) VALUES ('K',4, 100, -1, 0, 1) ON DUPLICATE KEY UPDATE `out`=100, `monster`=-1, `club3`=0, `changecolor`=1
http://note.tc.edu.tw/765.html
2016/07/18
2016/07/14
今天重新安裝proxmox 4.2版
可是裝完後發現之前版本會有的
/dev/mapper/pve-data 3856 808 3046 8% /var/lib/vz
不見了
到forum上去找 才發現 4.2的架構已經不同了
變成直接使用LVM來放image及ct
而不再把該lvm mkfs後再mout來用
因此必須手動把這個storage加上去
步驟
Datacenter -> Storage -> Add -> LVM-Thin
所以不建議用原机升級的方式來升到4.2
reinstall是比較好的方法
https://forum.proxmox.com/threads/dev-pve-data-not-mounted-after-fresh-4-2-install.27220/
用了LVM-Thin後有几個情況
雖然LXC可以在不用停机的情況下使用LVM的snapshot功能備份
但在不同node要migrate時 proxmox是使用dd來操作
導致效能非常的差 而且沒有百分比的顯示
評估過後
因為目前不使用LXC而且以後使用的机率也不大
所以再改回來使用目錄
步驟如下
lvremove /dev/pve/data
lvcreate -L 4M -n data pve
lvcreate -l 100%FREE -n datastore pve
mkfs.xfs /dev/pve/datastore
And mount it on your /etc/fstab
/dev/pve/datastore /mnt/datastore xfs defaults 0 0
可是裝完後發現之前版本會有的
/dev/mapper/pve-data 3856 808 3046 8% /var/lib/vz
不見了
到forum上去找 才發現 4.2的架構已經不同了
變成直接使用LVM來放image及ct
而不再把該lvm mkfs後再mout來用
因此必須手動把這個storage加上去
步驟
Datacenter -> Storage -> Add -> LVM-Thin
所以不建議用原机升級的方式來升到4.2
reinstall是比較好的方法
https://forum.proxmox.com/threads/dev-pve-data-not-mounted-after-fresh-4-2-install.27220/
用了LVM-Thin後有几個情況
雖然LXC可以在不用停机的情況下使用LVM的snapshot功能備份
但在不同node要migrate時 proxmox是使用dd來操作
導致效能非常的差 而且沒有百分比的顯示
評估過後
因為目前不使用LXC而且以後使用的机率也不大
所以再改回來使用目錄
步驟如下
lvremove /dev/pve/data
lvcreate -L 4M -n data pve
lvcreate -l 100%FREE -n datastore pve
mkfs.xfs /dev/pve/datastore
And mount it on your /etc/fstab
/dev/pve/datastore /mnt/datastore xfs defaults 0 0
2016/07/06
2016/07/05
原本一直以來都是使用flow-tools來收netflow的資料
http://freecode.com/projects/flow-tools
flow-capture
但最近的工作需要收集從fortiget傳來的netflow的資料
一開始也是使用flow-capture
但一直沒有資料
用tcpdump去看
是有資料進來的
但查了一些文件才知道fortiget送過來的是netflow v9
flow-capture不支援
於是改用nfdump 支援 v5 v7 v9
資料就正常收取了
http://nfdump.sourceforge.net/
nfcapd
http://freecode.com/projects/flow-tools
flow-capture
但最近的工作需要收集從fortiget傳來的netflow的資料
一開始也是使用flow-capture
但一直沒有資料
用tcpdump去看
是有資料進來的
但查了一些文件才知道fortiget送過來的是netflow v9
flow-capture不支援
於是改用nfdump 支援 v5 v7 v9
資料就正常收取了
http://nfdump.sourceforge.net/
nfcapd
2016/06/27
最近的新增需求是要起一個ftp server
可是不想要用vsftp或其他daemon
所以直接使用pyftpdlib
還滿方便的 有很多範例可以直接套用
但用了後發現沒有log功能
再查了一下資料
發現只要加紅色二行就搞定了
import logging
from pyftpdlib.handlers import FTPHandler
from pyftpdlib.servers import FTPServer
from pyftpdlib.authorizers import DummyAuthorizer
authorizer = DummyAuthorizer()
authorizer.add_user('user', '12345', '.', perm='elradfmwM')
handler = FTPHandler
handler.authorizer = authorizer
logging.basicConfig(filename='/var/log/pyftpd.log', level=logging.INFO)
server = FTPServer(('', 2121), handler)
server.serve_forever()
2016/06/18
在python中撈取mysql的資料
在cursor.execute後可以用cursor.fetchone()及cursor.fetchall()
如果回傳的只有一筆資料 可以使用cursor.fetchone() 可以少一點code
語法
cursor.execute(select count(*) from table)
result = cursor.fetchone()
print result[0]
如果回傳的資料有很多 則使用cursor.fetchall()
語法
cursor.execute(select * from table)
result = cursor.fetchall()
if result:
for record in result:
print record[0]
在cursor.execute後可以用cursor.fetchone()及cursor.fetchall()
如果回傳的只有一筆資料 可以使用cursor.fetchone() 可以少一點code
語法
cursor.execute(select count(*) from table)
result = cursor.fetchone()
print result[0]
如果回傳的資料有很多 則使用cursor.fetchall()
語法
cursor.execute(select * from table)
result = cursor.fetchall()
if result:
for record in result:
print record[0]
2016/06/17
今天找了一下有關mysql 日期時間的使用
大約記一下
分為
NOW() 2001-02-02 19:00:46
CURDATE() 2001-02-02
CURTIME() 19:00:46
使用加減功能
NOW() - INTERVAL 1 DAY 結果 2001-02-01 19:00:46
CURDATE()+ INTERVAL 1 DAY 結果 2001-02-03 00:00:00
未來 > NOW() < 過去
select * from table where enddate > NOW() 表示在NOW()之後的時間 表示未來 大未來
select * from table where enddate < NOW() 表示在NOW()之前的時間 表示過去 小過去
http://wen198599.pixnet.net/blog/post/22450019-mysql%E6%97%A5%E6%9C%9F%E5%92%8C%E6%99%82%E9%96%93%E5%87%BD%E6%95%B8%E4%B8%8D%E6%B1%82%E4%BA%BA
http://www.webasp.net/article/25/24538.htm
http://www.w3school.com.cn/sql/func_now.asp
http://www.mysqltutorial.org/mysql-now/
大約記一下
分為
NOW() 2001-02-02 19:00:46
CURDATE() 2001-02-02
CURTIME() 19:00:46
使用加減功能
NOW() - INTERVAL 1 DAY 結果 2001-02-01 19:00:46
CURDATE()
未來 > NOW() < 過去
select * from table where enddate > NOW() 表示在NOW()之後的時間 表示未來 大未來
select * from table where enddate < NOW() 表示在NOW()之前的時間 表示過去 小過去
http://wen198599.pixnet.net/blog/post/22450019-mysql%E6%97%A5%E6%9C%9F%E5%92%8C%E6%99%82%E9%96%93%E5%87%BD%E6%95%B8%E4%B8%8D%E6%B1%82%E4%BA%BA
http://www.webasp.net/article/25/24538.htm
http://www.w3school.com.cn/sql/func_now.asp
http://www.mysqltutorial.org/mysql-now/
2016/06/15
2016/06/11
今天使用python要把資料塞進mysql時一直出問題
明明就有執行
也沒錯誤訊訊息
但資料就是沒進去
本來以為是跳脫字元的問題
試了也沒有
後來找到一個方便的語法
也不用再考慮單引號 雙引號要使用跳脫字元的情況
語法如下
最後的 db.commit() 一定要下
就是因為這個沒下
才試了一下午
最後還是問了高手才知道的
sql="insert into table values(%s,%s,%s,)"
cursor.execute(sql,(now,i,88888))
db.commit()
now是現在時間
i是變數
88888是數字
對應到table
datetime
varchar(50)
bigint(20)
明明就有執行
也沒錯誤訊訊息
但資料就是沒進去
本來以為是跳脫字元的問題
試了也沒有
後來找到一個方便的語法
也不用再考慮單引號 雙引號要使用跳脫字元的情況
語法如下
最後的 db.commit() 一定要下
就是因為這個沒下
才試了一下午
最後還是問了高手才知道的
sql="insert into table values(%s,%s,%s,)"
cursor.execute(sql,(now,i,88888))
db.commit()
now是現在時間
i是變數
88888是數字
對應到table
datetime
varchar(50)
bigint(20)
2016/06/10
2016/05/31
fio 測試範例
# This job file tries to mimic the Intel IOMeter File Server Access Pattern
[global]
description=Emulation of Intel IOmeter File Server Access Pattern
[iometer]
bssplit=512/10:1k/5:2k/5:4k/60:8k/2:16k/4:32k/4:64k/10
filename=PhysicalDrive1:PhysicalDrive2:PhysicalDrive3
size=1G
rw=randrw
#set read 50% write 50%
rwmixread=50
direct=1
runtime=60
# IOMeter defines the server loads as the following:
# iodepth=1 Linear
# iodepth=4 Very Light
# iodepth=8 Light
# iodepth=64 Moderate
# iodepth=256 Heavy
iodepth=64
修改filename 及 size
其他參數視需要修改
以上存為 test.fio
執行fio test.fio
用shell 重複執行
#/bin/bash
rm /tmp/fio_test_log
while :
do
fio test.fio -output=/tmp/iolog
cat /tmp/iolog >> /tmp/fio_test_log
done
http://benjr.tw/93666
# This job file tries to mimic the Intel IOMeter File Server Access Pattern
[global]
description=Emulation of Intel IOmeter File Server Access Pattern
[iometer]
bssplit=512/10:1k/5:2k/5:4k/60:8k/2:16k/4:32k/4:64k/10
filename=PhysicalDrive1:PhysicalDrive2:PhysicalDrive3
size=1G
rw=randrw
#set read 50% write 50%
rwmixread=50
direct=1
runtime=60
# IOMeter defines the server loads as the following:
# iodepth=1 Linear
# iodepth=4 Very Light
# iodepth=8 Light
# iodepth=64 Moderate
# iodepth=256 Heavy
iodepth=64
修改filename 及 size
其他參數視需要修改
以上存為 test.fio
執行fio test.fio
用shell 重複執行
#/bin/bash
rm /tmp/fio_test_log
while :
do
fio test.fio -output=/tmp/iolog
cat /tmp/iolog >> /tmp/fio_test_log
done
http://benjr.tw/93666
2016/05/23
2016/05/20
已經使用很久的ipaudit有個scan report 的功能 如下圖
但使用curl加上html2text捉下來後ip就如圖所示會自動補0
找來找去終於找到一個方便的方法來處理
就是使用expr
整個程式如下
#!/bin/bash
/usr/bin/curl "http://10.123.123.123/~ipaudit/cgi-bin/ipahttp?30min/0traffic+current"|/usr/bin/html2text |sed -n '18,37p'|awk '$3 > 100 {print $1}' > /tmp/ipaudit_in_scan_ip_tmp
rm /tmp/ipaudit_in_scan_ip
for i in `cat /tmp/ipaudit_in_scan_ip_tmp`
do
a=`echo $i|cut -d '.' -f 1`
a1=`expr $a / 1`
a=`echo $i|cut -d '.' -f 2`
a2=`expr $a / 1`
a=`echo $i|cut -d '.' -f 3`
a3=`expr $a / 1`
a=`echo $i|cut -d '.' -f 4`
a4=`expr $a / 1`
echo $a1"."$a2"."$a3"."$a4 >> /tmp/ipaudit_in_scan_ip
done
但使用curl加上html2text捉下來後ip就如圖所示會自動補0
找來找去終於找到一個方便的方法來處理
就是使用expr
整個程式如下
#!/bin/bash
/usr/bin/curl "http://10.123.123.123/~ipaudit/cgi-bin/ipahttp?30min/0traffic+current"|/usr/bin/html2text |sed -n '18,37p'|awk '$3 > 100 {print $1}' > /tmp/ipaudit_in_scan_ip_tmp
rm /tmp/ipaudit_in_scan_ip
for i in `cat /tmp/ipaudit_in_scan_ip_tmp`
do
a=`echo $i|cut -d '.' -f 1`
a1=`expr $a / 1`
a=`echo $i|cut -d '.' -f 2`
a2=`expr $a / 1`
a=`echo $i|cut -d '.' -f 3`
a3=`expr $a / 1`
a=`echo $i|cut -d '.' -f 4`
a4=`expr $a / 1`
echo $a1"."$a2"."$a3"."$a4 >> /tmp/ipaudit_in_scan_ip
done
前几天把wsus換到了vm上
但換過去後卻一直出問題
三不五時服務就會死掉
log顯示如下 每次都是死在wsuspool
May 19 07:38:38 WSUS WAS: 5013: 服務應用程式集區 'WsusPool' 的處理序關閉時超過次數限制。處理序識別碼為 '5192'。
May 19 07:38:38 WSUS WAS: 5117: 服務應用程式集區 'WsusPool' 的背景工作處理序已要求回收,因為它已達到私用位元組記憶體限制。
May 19 08:08:27 WSUS WAS: 5117: 服務應用程式集區 'WsusPool' 的背景工作處理序已要求回收,因為它已達到私用位元組記憶體限制。
May 19 08:10:49 WSUS WAS: 5117: 服務應用程式集區 'WsusPool' 的背景工作處理序已要求回收,因為它已達到私用位元組記憶體限制。
May 19 08:12:19 WSUS WAS: 5138: 服務應用程式集區 'WsusPool' 的工作者處理序 '6184' 無法在指定的時間停止通訊協定 'http' 的接聽程式通道。資料欄位包含錯誤號碼。
May 19 08:12:19 WSUS WAS: 5013: 服務應用程式集區 'WsusPool' 的處理序關閉時超過次數限制。處理序識別碼為 '6184'。
May 19 08:12:19 WSUS WAS: 5117: 服務應用程式集區 'WsusPool' 的背景工作處理序已要求回收,因為它已達到私用位元組記憶體限制。
May 19 08:13:50 WSUS WAS: 5138: 服務應用程式集區 'WsusPool' 的工作者處理序 '5964' 無法在指定的時間停止通訊協定 'http' 的接聽程式通道。資料欄位包含錯誤號碼。
May 19 08:13:50 WSUS WAS: 5013: 服務應用程式集區 'WsusPool' 的處理序關閉時超過次數限制。處理序識別碼為 '5964'。
May 19 08:13:50 WSUS WAS: 5002: 正在自動停止應用程式集區 'WsusPool',因為服務該應用程式集區的處理序中發生一連串的失敗。
不過原來在實体机是windows server 2012 沒調過這個值也沒有問題
在vm上的是windows server 2012 R2
但換過去後卻一直出問題
三不五時服務就會死掉
log顯示如下 每次都是死在wsuspool
May 19 07:38:38 WSUS WAS: 5013: 服務應用程式集區 'WsusPool' 的處理序關閉時超過次數限制。處理序識別碼為 '5192'。
May 19 07:38:38 WSUS WAS: 5117: 服務應用程式集區 'WsusPool' 的背景工作處理序已要求回收,因為它已達到私用位元組記憶體限制。
May 19 08:08:27 WSUS WAS: 5117: 服務應用程式集區 'WsusPool' 的背景工作處理序已要求回收,因為它已達到私用位元組記憶體限制。
May 19 08:10:49 WSUS WAS: 5117: 服務應用程式集區 'WsusPool' 的背景工作處理序已要求回收,因為它已達到私用位元組記憶體限制。
May 19 08:12:19 WSUS WAS: 5138: 服務應用程式集區 'WsusPool' 的工作者處理序 '6184' 無法在指定的時間停止通訊協定 'http' 的接聽程式通道。資料欄位包含錯誤號碼。
May 19 08:12:19 WSUS WAS: 5013: 服務應用程式集區 'WsusPool' 的處理序關閉時超過次數限制。處理序識別碼為 '6184'。
May 19 08:12:19 WSUS WAS: 5117: 服務應用程式集區 'WsusPool' 的背景工作處理序已要求回收,因為它已達到私用位元組記憶體限制。
May 19 08:13:50 WSUS WAS: 5138: 服務應用程式集區 'WsusPool' 的工作者處理序 '5964' 無法在指定的時間停止通訊協定 'http' 的接聽程式通道。資料欄位包含錯誤號碼。
May 19 08:13:50 WSUS WAS: 5013: 服務應用程式集區 'WsusPool' 的處理序關閉時超過次數限制。處理序識別碼為 '5964'。
May 19 08:13:50 WSUS WAS: 5002: 正在自動停止應用程式集區 'WsusPool',因為服務該應用程式集區的處理序中發生一連串的失敗。
找了一下資料 請seek的工程師幫忙
調整了一下記憶体的值 (預設為1G 加大到4G)
過了一天 目前看來正常了
再觀察看看
設定流程如下圖所示
不過原來在實体机是windows server 2012 沒調過這個值也沒有問題
在vm上的是windows server 2012 R2
2016/05/19
一直以來很困擾在使用vi的編輯模式時按方向鍵會出現英文字的問題
找到解決方法
在家目錄底下,新增檔案「.vimrc」,在檔案中加入下列2行內容:
set nocompatible
set backspace=2
http://www.geego.com.tw/technical-discussion-forum/tech-tips-using-vi-editor-on-ubuntu-%E7%B7%A8%E8%BC%AF-%E6%96%B9%E5%90%91%E9%8D%B5-%E5%80%92%E9%80%80%E9%8D%B5-%E6%93%8D%E4%BD%9C
找到解決方法
在家目錄底下,新增檔案「.vimrc」,在檔案中加入下列2行內容:
set nocompatible
set backspace=2
http://www.geego.com.tw/technical-discussion-forum/tech-tips-using-vi-editor-on-ubuntu-%E7%B7%A8%E8%BC%AF-%E6%96%B9%E5%90%91%E9%8D%B5-%E5%80%92%E9%80%80%E9%8D%B5-%E6%93%8D%E4%BD%9C
2016/05/18
因為chrome在之前几個月開始就不再支援32bit的linux
所以家裡使用的電腦就想重灌為64bit
這次選了linux mint
安裝速度滿快的
而且直接捉到我的usb網卡 直是方便
但裝完後裝上chrome卻發現網頁上有些字的字型變的很怪
爬了一下文 發現是字型的問題
因為系統自動多裝了以下二套字型
sudo apt-get remove fonts-arphic-ukai
sudo apt-get remove fonts-arphic-uming
移除後再重開chrome就正常了
firefox並沒有這個問題
所以家裡使用的電腦就想重灌為64bit
這次選了linux mint
安裝速度滿快的
而且直接捉到我的usb網卡 直是方便
但裝完後裝上chrome卻發現網頁上有些字的字型變的很怪
爬了一下文 發現是字型的問題
因為系統自動多裝了以下二套字型
sudo apt-get remove fonts-arphic-ukai
sudo apt-get remove fonts-arphic-uming
移除後再重開chrome就正常了
firefox並沒有這個問題
2016/05/17
最近因為實體機的wsus出問題
因此把她移到proxmox上
本來是想在win上mount nfs來用
但看來wsus並不支援
後來改用iscsi
但在kvm的硬碟效能看來並不好
想調看看
依據下面的文件做了一下測試
https://pve.proxmox.com/wiki/Performance_Tweaks
使用fio
四個mode的結果分別如下
no cache (proxmox預設)
iometer: (groupid=0, jobs=1): err= 0: pid=4376: Tue May 17 01:14:11 2016 Descri
ption : [Emulation of Intel IOmeter File Server Access Pattern]
read : io=839580KB, bw=986.43KB/s, iops=187, runt=851139msec
slat (usec): min=33, max=12019, avg=135.28, stdev=127.09
clat (usec): min=863, max=45860K, avg=272726.04, stdev=690206.66
lat (msec): min=1, max=45860, avg=272.86, stdev=690.21
clat percentiles (msec):
| 1.00th=[ 14], 5.00th=[ 34], 10.00th=[ 52], 20.00th=[ 85],
| 30.00th=[ 119], 40.00th=[ 155], 50.00th=[ 198], 60.00th=[ 249],
| 70.00th=[ 314], 80.00th=[ 392], 90.00th=[ 498], 95.00th=[ 668],
| 99.00th=[ 1237], 99.50th=[ 1418], 99.90th=[ 1958], 99.95th=[10683],
| 99.99th=[16712]
bw (KB /s): min= 1, max= 3527, per=100.00%, avg=1031.92, stdev=539.62
write: io=209006KB, bw=251453B/s, iops=47, runt=851139msec
slat (usec): min=36, max=9979, avg=144.38, stdev=139.48
clat (msec): min=1, max=42109, avg=268.91, stdev=674.52
lat (msec): min=1, max=42109, avg=269.06, stdev=674.52
clat percentiles (msec):
| 1.00th=[ 13], 5.00th=[ 33], 10.00th=[ 52], 20.00th=[ 85],
| 30.00th=[ 117], 40.00th=[ 153], 50.00th=[ 194], 60.00th=[ 247],
| 70.00th=[ 310], 80.00th=[ 388], 90.00th=[ 490], 95.00th=[ 660],
| 99.00th=[ 1221], 99.50th=[ 1434], 99.90th=[ 2008], 99.95th=[ 8717],
| 99.99th=[16712]
bw (KB /s): min= 0, max= 976, per=100.00%, avg=257.99, stdev=155.70
lat (usec) : 1000=0.01%
lat (msec) : 2=0.01%, 4=0.07%, 10=0.50%, 20=1.59%, 50=7.30%
lat (msec) : 100=15.26%, 250=35.57%, 500=29.91%, 750=5.77%, 1000=1.93%
lat (msec) : 2000=1.99%, >=2000=0.10%
cpu : usr=1.06%, sys=4.46%, ctx=0, majf=0, minf=0
IO depths : 1=0.1%, 2=0.1%, 4=0.1%, 8=0.1%, 16=0.1%, 32=0.3%, >=64=99.7%
submit : 0=0.0%, 4=100.0%, 8=0.0%, 16=0.0%, 32=0.0%, 64=0.0%, >=64=0.0%
complete : 0=0.0%, 4=100.0%, 8=0.1%, 16=0.1%, 32=0.0%, 64=0.1%, >=64=0.0%
issued : total=r=159733/w=40419/d=0, short=r=0/w=0/d=0, drop=r=0/w=0/d=0
latency : target=0, window=0, percentile=100.00%, depth=64
Run status group 0 (all jobs):
READ: io=839579KB, aggrb=986KB/s, minb=986KB/s, maxb=986KB/s, mint=851139msec
, maxt=851139msec
WRITE: io=209005KB, aggrb=245KB/s, minb=245KB/s, maxb=245KB/s, mint=851139msec
, maxt=851139msec
direct sync
iometer: (groupid=0, jobs=1): err= 0: pid=3960: Tue May 17 01:34:28 2016 Descri
ption : [Emulation of Intel IOmeter File Server Access Pattern]
read : io=839580KB, bw=990904B/s, iops=184, runt=867621msec
slat (usec): min=29, max=4295, avg=127.63, stdev=94.92
clat (msec): min=1, max=3990, avg=278.10, stdev=248.29
lat (msec): min=1, max=3990, avg=278.23, stdev=248.29
clat percentiles (msec):
| 1.00th=[ 15], 5.00th=[ 39], 10.00th=[ 61], 20.00th=[ 98],
| 30.00th=[ 135], 40.00th=[ 176], 50.00th=[ 219], 60.00th=[ 265],
| 70.00th=[ 326], 80.00th=[ 404], 90.00th=[ 529], 95.00th=[ 734],
| 99.00th=[ 1303], 99.50th=[ 1516], 99.90th=[ 1860], 99.95th=[ 2008],
| 99.99th=[ 2474]
bw (KB /s): min= 104, max= 3121, per=100.00%, avg=972.63, stdev=462.35
write: io=209006KB, bw=246676B/s, iops=46, runt=867621msec
slat (usec): min=33, max=3792, avg=137.96, stdev=101.21
clat (msec): min=1, max=3267, avg=273.82, stdev=245.31
lat (msec): min=1, max=3267, avg=273.95, stdev=245.31
clat percentiles (msec):
| 1.00th=[ 14], 5.00th=[ 37], 10.00th=[ 59], 20.00th=[ 95],
| 30.00th=[ 131], 40.00th=[ 172], 50.00th=[ 215], 60.00th=[ 262],
| 70.00th=[ 322], 80.00th=[ 396], 90.00th=[ 523], 95.00th=[ 734],
| 99.00th=[ 1270], 99.50th=[ 1483], 99.90th=[ 1795], 99.95th=[ 1926],
| 99.99th=[ 2376]
bw (KB /s): min= 1, max= 837, per=100.00%, avg=241.81, stdev=139.50
lat (msec) : 2=0.01%, 4=0.06%, 10=0.43%, 20=1.28%, 50=5.89%
lat (msec) : 100=13.20%, 250=36.27%, 500=31.53%, 750=6.52%, 1000=2.28%
lat (msec) : 2000=2.48%, >=2000=0.05%
cpu : usr=0.58%, sys=4.26%, ctx=0, majf=0, minf=0
IO depths : 1=0.1%, 2=0.1%, 4=0.1%, 8=0.1%, 16=0.1%, 32=0.1%, >=64=99.9%
submit : 0=0.0%, 4=100.0%, 8=0.0%, 16=0.0%, 32=0.0%, 64=0.0%, >=64=0.0%
complete : 0=0.0%, 4=100.0%, 8=0.1%, 16=0.0%, 32=0.0%, 64=0.1%, >=64=0.0%
issued : total=r=159733/w=40419/d=0, short=r=0/w=0/d=0, drop=r=0/w=0/d=0
latency : target=0, window=0, percentile=100.00%, depth=64
Run status group 0 (all jobs):
READ: io=839579KB, aggrb=967KB/s, minb=967KB/s, maxb=967KB/s, mint=867621msec
, maxt=867621msec
WRITE: io=209005KB, aggrb=240KB/s, minb=240KB/s, maxb=240KB/s, mint=867621msec
, maxt=867621msec
writethrough
iometer: (groupid=0, jobs=1): err= 0: pid=464: Tue May 17 01:44:14 2016 Descrip
tion : [Emulation of Intel IOmeter File Server Access Pattern]
read : io=839580KB, bw=2750.9KB/s, iops=523, runt=305208msec
slat (usec): min=33, max=3381, avg=148.74, stdev=118.02
clat (usec): min=525, max=3432.2K, avg=97497.21, stdev=190958.21
lat (usec): min=608, max=3432.2K, avg=97645.95, stdev=190948.63
clat percentiles (msec):
| 1.00th=[ 4], 5.00th=[ 8], 10.00th=[ 11], 20.00th=[ 17],
| 30.00th=[ 22], 40.00th=[ 28], 50.00th=[ 35], 60.00th=[ 42],
| 70.00th=[ 57], 80.00th=[ 96], 90.00th=[ 265], 95.00th=[ 465],
| 99.00th=[ 996], 99.50th=[ 1287], 99.90th=[ 1713], 99.95th=[ 1844],
| 99.99th=[ 2245]
bw (KB /s): min= 117, max=10905, per=100.00%, avg=2768.59, stdev=2650.18
write: io=209006KB, bw=701232B/s, iops=132, runt=305208msec
slat (usec): min=36, max=2704, avg=157.69, stdev=118.79
clat (usec): min=643, max=2868.8K, avg=96528.89, stdev=185218.15
lat (usec): min=730, max=2868.9K, avg=96686.58, stdev=185208.44
clat percentiles (msec):
| 1.00th=[ 4], 5.00th=[ 8], 10.00th=[ 11], 20.00th=[ 17],
| 30.00th=[ 22], 40.00th=[ 28], 50.00th=[ 35], 60.00th=[ 42],
| 70.00th=[ 57], 80.00th=[ 97], 90.00th=[ 265], 95.00th=[ 461],
| 99.00th=[ 963], 99.50th=[ 1221], 99.90th=[ 1631], 99.95th=[ 1778],
| 99.99th=[ 2008]
bw (KB /s): min= 1, max= 3243, per=100.00%, avg=688.92, stdev=677.96
lat (usec) : 750=0.01%, 1000=0.02%
lat (msec) : 2=0.21%, 4=1.13%, 10=8.32%, 20=17.18%, 50=40.00%
lat (msec) : 100=13.73%, 250=8.92%, 500=6.15%, 750=2.57%, 1000=0.79%
lat (msec) : 2000=0.96%, >=2000=0.02%
cpu : usr=2.95%, sys=11.47%, ctx=0, majf=0, minf=0
IO depths : 1=0.1%, 2=0.1%, 4=0.1%, 8=0.1%, 16=0.1%, 32=22.4%, >=64=77.6%
submit : 0=0.0%, 4=100.0%, 8=0.0%, 16=0.0%, 32=0.0%, 64=0.0%, >=64=0.0%
complete : 0=0.0%, 4=99.9%, 8=0.1%, 16=0.1%, 32=0.1%, 64=0.1%, >=64=0.0%
issued : total=r=159733/w=40419/d=0, short=r=0/w=0/d=0, drop=r=0/w=0/d=0
latency : target=0, window=0, percentile=100.00%, depth=64
Run status group 0 (all jobs):
READ: io=839579KB, aggrb=2750KB/s, minb=2750KB/s, maxb=2750KB/s, mint=305208m
sec, maxt=305208msec
WRITE: io=209005KB, aggrb=684KB/s, minb=684KB/s, maxb=684KB/s, mint=305208msec
, maxt=305208msec
writeback
iometer: (groupid=0, jobs=1): err= 0: pid=1904: Tue May 17 01:56:37 2016 Descri
ption : [Emulation of Intel IOmeter File Server Access Pattern]
read : io=839580KB, bw=2514.4KB/s, iops=478, runt=333921msec
slat (usec): min=29, max=12023, avg=185.33, stdev=221.12
clat (usec): min=538, max=13009K, avg=106457.27, stdev=193275.54
lat (usec): min=670, max=13009K, avg=106642.60, stdev=193264.18
clat percentiles (msec):
| 1.00th=[ 5], 5.00th=[ 9], 10.00th=[ 13], 20.00th=[ 21],
| 30.00th=[ 29], 40.00th=[ 38], 50.00th=[ 48], 60.00th=[ 68],
| 70.00th=[ 93], 80.00th=[ 137], 90.00th=[ 265], 95.00th=[ 408],
| 99.00th=[ 783], 99.50th=[ 1156], 99.90th=[ 1795], 99.95th=[ 2024],
| 99.99th=[ 4490]
bw (KB /s): min= 70, max=10009, per=100.00%, avg=2528.25, stdev=1930.08
write: io=209006KB, bw=640934B/s, iops=121, runt=333921msec
slat (usec): min=32, max=12301, avg=195.26, stdev=240.65
clat (usec): min=637, max=10893K, avg=106044.70, stdev=199408.62
lat (usec): min=699, max=10894K, avg=106239.95, stdev=199397.25
clat percentiles (msec):
| 1.00th=[ 5], 5.00th=[ 9], 10.00th=[ 13], 20.00th=[ 21],
| 30.00th=[ 29], 40.00th=[ 38], 50.00th=[ 48], 60.00th=[ 68],
| 70.00th=[ 94], 80.00th=[ 137], 90.00th=[ 265], 95.00th=[ 404],
| 99.00th=[ 742], 99.50th=[ 1106], 99.90th=[ 1811], 99.95th=[ 2008],
| 99.99th=[ 7308]
bw (KB /s): min= 3, max= 2501, per=100.00%, avg=629.21, stdev=504.36
lat (usec) : 750=0.01%, 1000=0.01%
lat (msec) : 2=0.14%, 4=0.75%, 10=5.70%, 20=12.30%, 50=32.48%
lat (msec) : 100=20.56%, 250=17.35%, 500=7.78%, 750=1.87%, 1000=0.38%
lat (msec) : 2000=0.62%, >=2000=0.06%
cpu : usr=2.10%, sys=12.88%, ctx=0, majf=0, minf=0
IO depths : 1=0.1%, 2=0.1%, 4=0.1%, 8=0.1%, 16=0.1%, 32=25.7%, >=64=74.3%
submit : 0=0.0%, 4=100.0%, 8=0.0%, 16=0.0%, 32=0.0%, 64=0.0%, >=64=0.0%
complete : 0=0.0%, 4=99.8%, 8=0.2%, 16=0.1%, 32=0.0%, 64=0.1%, >=64=0.0%
issued : total=r=159733/w=40419/d=0, short=r=0/w=0/d=0, drop=r=0/w=0/d=0
latency : target=0, window=0, percentile=100.00%, depth=64
Run status group 0 (all jobs):
READ: io=839579KB, aggrb=2514KB/s, minb=2514KB/s, maxb=2514KB/s, mint=333921m
sec, maxt=333921msec
WRITE: io=209005KB, aggrb=625KB/s, minb=625KB/s, maxb=625KB/s, mint=333921msec
, maxt=333921msec
單純看iops
writeback 和 writethrough 差不多
但文件上針對 writeback有這一句
Warn : you can loose datas in case of a powerfailure
所以看來 writethrough是比較好的選擇
因此把她移到proxmox上
本來是想在win上mount nfs來用
但看來wsus並不支援
後來改用iscsi
但在kvm的硬碟效能看來並不好
想調看看
依據下面的文件做了一下測試
https://pve.proxmox.com/wiki/Performance_Tweaks
使用fio
四個mode的結果分別如下
no cache (proxmox預設)
iometer: (groupid=0, jobs=1): err= 0: pid=4376: Tue May 17 01:14:11 2016 Descri
ption : [Emulation of Intel IOmeter File Server Access Pattern]
read : io=839580KB, bw=986.43KB/s, iops=187, runt=851139msec
slat (usec): min=33, max=12019, avg=135.28, stdev=127.09
clat (usec): min=863, max=45860K, avg=272726.04, stdev=690206.66
lat (msec): min=1, max=45860, avg=272.86, stdev=690.21
clat percentiles (msec):
| 1.00th=[ 14], 5.00th=[ 34], 10.00th=[ 52], 20.00th=[ 85],
| 30.00th=[ 119], 40.00th=[ 155], 50.00th=[ 198], 60.00th=[ 249],
| 70.00th=[ 314], 80.00th=[ 392], 90.00th=[ 498], 95.00th=[ 668],
| 99.00th=[ 1237], 99.50th=[ 1418], 99.90th=[ 1958], 99.95th=[10683],
| 99.99th=[16712]
bw (KB /s): min= 1, max= 3527, per=100.00%, avg=1031.92, stdev=539.62
write: io=209006KB, bw=251453B/s, iops=47, runt=851139msec
slat (usec): min=36, max=9979, avg=144.38, stdev=139.48
clat (msec): min=1, max=42109, avg=268.91, stdev=674.52
lat (msec): min=1, max=42109, avg=269.06, stdev=674.52
clat percentiles (msec):
| 1.00th=[ 13], 5.00th=[ 33], 10.00th=[ 52], 20.00th=[ 85],
| 30.00th=[ 117], 40.00th=[ 153], 50.00th=[ 194], 60.00th=[ 247],
| 70.00th=[ 310], 80.00th=[ 388], 90.00th=[ 490], 95.00th=[ 660],
| 99.00th=[ 1221], 99.50th=[ 1434], 99.90th=[ 2008], 99.95th=[ 8717],
| 99.99th=[16712]
bw (KB /s): min= 0, max= 976, per=100.00%, avg=257.99, stdev=155.70
lat (usec) : 1000=0.01%
lat (msec) : 2=0.01%, 4=0.07%, 10=0.50%, 20=1.59%, 50=7.30%
lat (msec) : 100=15.26%, 250=35.57%, 500=29.91%, 750=5.77%, 1000=1.93%
lat (msec) : 2000=1.99%, >=2000=0.10%
cpu : usr=1.06%, sys=4.46%, ctx=0, majf=0, minf=0
IO depths : 1=0.1%, 2=0.1%, 4=0.1%, 8=0.1%, 16=0.1%, 32=0.3%, >=64=99.7%
submit : 0=0.0%, 4=100.0%, 8=0.0%, 16=0.0%, 32=0.0%, 64=0.0%, >=64=0.0%
complete : 0=0.0%, 4=100.0%, 8=0.1%, 16=0.1%, 32=0.0%, 64=0.1%, >=64=0.0%
issued : total=r=159733/w=40419/d=0, short=r=0/w=0/d=0, drop=r=0/w=0/d=0
latency : target=0, window=0, percentile=100.00%, depth=64
Run status group 0 (all jobs):
READ: io=839579KB, aggrb=986KB/s, minb=986KB/s, maxb=986KB/s, mint=851139msec
, maxt=851139msec
WRITE: io=209005KB, aggrb=245KB/s, minb=245KB/s, maxb=245KB/s, mint=851139msec
, maxt=851139msec
direct sync
iometer: (groupid=0, jobs=1): err= 0: pid=3960: Tue May 17 01:34:28 2016 Descri
ption : [Emulation of Intel IOmeter File Server Access Pattern]
read : io=839580KB, bw=990904B/s, iops=184, runt=867621msec
slat (usec): min=29, max=4295, avg=127.63, stdev=94.92
clat (msec): min=1, max=3990, avg=278.10, stdev=248.29
lat (msec): min=1, max=3990, avg=278.23, stdev=248.29
clat percentiles (msec):
| 1.00th=[ 15], 5.00th=[ 39], 10.00th=[ 61], 20.00th=[ 98],
| 30.00th=[ 135], 40.00th=[ 176], 50.00th=[ 219], 60.00th=[ 265],
| 70.00th=[ 326], 80.00th=[ 404], 90.00th=[ 529], 95.00th=[ 734],
| 99.00th=[ 1303], 99.50th=[ 1516], 99.90th=[ 1860], 99.95th=[ 2008],
| 99.99th=[ 2474]
bw (KB /s): min= 104, max= 3121, per=100.00%, avg=972.63, stdev=462.35
write: io=209006KB, bw=246676B/s, iops=46, runt=867621msec
slat (usec): min=33, max=3792, avg=137.96, stdev=101.21
clat (msec): min=1, max=3267, avg=273.82, stdev=245.31
lat (msec): min=1, max=3267, avg=273.95, stdev=245.31
clat percentiles (msec):
| 1.00th=[ 14], 5.00th=[ 37], 10.00th=[ 59], 20.00th=[ 95],
| 30.00th=[ 131], 40.00th=[ 172], 50.00th=[ 215], 60.00th=[ 262],
| 70.00th=[ 322], 80.00th=[ 396], 90.00th=[ 523], 95.00th=[ 734],
| 99.00th=[ 1270], 99.50th=[ 1483], 99.90th=[ 1795], 99.95th=[ 1926],
| 99.99th=[ 2376]
bw (KB /s): min= 1, max= 837, per=100.00%, avg=241.81, stdev=139.50
lat (msec) : 2=0.01%, 4=0.06%, 10=0.43%, 20=1.28%, 50=5.89%
lat (msec) : 100=13.20%, 250=36.27%, 500=31.53%, 750=6.52%, 1000=2.28%
lat (msec) : 2000=2.48%, >=2000=0.05%
cpu : usr=0.58%, sys=4.26%, ctx=0, majf=0, minf=0
IO depths : 1=0.1%, 2=0.1%, 4=0.1%, 8=0.1%, 16=0.1%, 32=0.1%, >=64=99.9%
submit : 0=0.0%, 4=100.0%, 8=0.0%, 16=0.0%, 32=0.0%, 64=0.0%, >=64=0.0%
complete : 0=0.0%, 4=100.0%, 8=0.1%, 16=0.0%, 32=0.0%, 64=0.1%, >=64=0.0%
issued : total=r=159733/w=40419/d=0, short=r=0/w=0/d=0, drop=r=0/w=0/d=0
latency : target=0, window=0, percentile=100.00%, depth=64
Run status group 0 (all jobs):
READ: io=839579KB, aggrb=967KB/s, minb=967KB/s, maxb=967KB/s, mint=867621msec
, maxt=867621msec
WRITE: io=209005KB, aggrb=240KB/s, minb=240KB/s, maxb=240KB/s, mint=867621msec
, maxt=867621msec
writethrough
iometer: (groupid=0, jobs=1): err= 0: pid=464: Tue May 17 01:44:14 2016 Descrip
tion : [Emulation of Intel IOmeter File Server Access Pattern]
read : io=839580KB, bw=2750.9KB/s, iops=523, runt=305208msec
slat (usec): min=33, max=3381, avg=148.74, stdev=118.02
clat (usec): min=525, max=3432.2K, avg=97497.21, stdev=190958.21
lat (usec): min=608, max=3432.2K, avg=97645.95, stdev=190948.63
clat percentiles (msec):
| 1.00th=[ 4], 5.00th=[ 8], 10.00th=[ 11], 20.00th=[ 17],
| 30.00th=[ 22], 40.00th=[ 28], 50.00th=[ 35], 60.00th=[ 42],
| 70.00th=[ 57], 80.00th=[ 96], 90.00th=[ 265], 95.00th=[ 465],
| 99.00th=[ 996], 99.50th=[ 1287], 99.90th=[ 1713], 99.95th=[ 1844],
| 99.99th=[ 2245]
bw (KB /s): min= 117, max=10905, per=100.00%, avg=2768.59, stdev=2650.18
write: io=209006KB, bw=701232B/s, iops=132, runt=305208msec
slat (usec): min=36, max=2704, avg=157.69, stdev=118.79
clat (usec): min=643, max=2868.8K, avg=96528.89, stdev=185218.15
lat (usec): min=730, max=2868.9K, avg=96686.58, stdev=185208.44
clat percentiles (msec):
| 1.00th=[ 4], 5.00th=[ 8], 10.00th=[ 11], 20.00th=[ 17],
| 30.00th=[ 22], 40.00th=[ 28], 50.00th=[ 35], 60.00th=[ 42],
| 70.00th=[ 57], 80.00th=[ 97], 90.00th=[ 265], 95.00th=[ 461],
| 99.00th=[ 963], 99.50th=[ 1221], 99.90th=[ 1631], 99.95th=[ 1778],
| 99.99th=[ 2008]
bw (KB /s): min= 1, max= 3243, per=100.00%, avg=688.92, stdev=677.96
lat (usec) : 750=0.01%, 1000=0.02%
lat (msec) : 2=0.21%, 4=1.13%, 10=8.32%, 20=17.18%, 50=40.00%
lat (msec) : 100=13.73%, 250=8.92%, 500=6.15%, 750=2.57%, 1000=0.79%
lat (msec) : 2000=0.96%, >=2000=0.02%
cpu : usr=2.95%, sys=11.47%, ctx=0, majf=0, minf=0
IO depths : 1=0.1%, 2=0.1%, 4=0.1%, 8=0.1%, 16=0.1%, 32=22.4%, >=64=77.6%
submit : 0=0.0%, 4=100.0%, 8=0.0%, 16=0.0%, 32=0.0%, 64=0.0%, >=64=0.0%
complete : 0=0.0%, 4=99.9%, 8=0.1%, 16=0.1%, 32=0.1%, 64=0.1%, >=64=0.0%
issued : total=r=159733/w=40419/d=0, short=r=0/w=0/d=0, drop=r=0/w=0/d=0
latency : target=0, window=0, percentile=100.00%, depth=64
Run status group 0 (all jobs):
READ: io=839579KB, aggrb=2750KB/s, minb=2750KB/s, maxb=2750KB/s, mint=305208m
sec, maxt=305208msec
WRITE: io=209005KB, aggrb=684KB/s, minb=684KB/s, maxb=684KB/s, mint=305208msec
, maxt=305208msec
writeback
iometer: (groupid=0, jobs=1): err= 0: pid=1904: Tue May 17 01:56:37 2016 Descri
ption : [Emulation of Intel IOmeter File Server Access Pattern]
read : io=839580KB, bw=2514.4KB/s, iops=478, runt=333921msec
slat (usec): min=29, max=12023, avg=185.33, stdev=221.12
clat (usec): min=538, max=13009K, avg=106457.27, stdev=193275.54
lat (usec): min=670, max=13009K, avg=106642.60, stdev=193264.18
clat percentiles (msec):
| 1.00th=[ 5], 5.00th=[ 9], 10.00th=[ 13], 20.00th=[ 21],
| 30.00th=[ 29], 40.00th=[ 38], 50.00th=[ 48], 60.00th=[ 68],
| 70.00th=[ 93], 80.00th=[ 137], 90.00th=[ 265], 95.00th=[ 408],
| 99.00th=[ 783], 99.50th=[ 1156], 99.90th=[ 1795], 99.95th=[ 2024],
| 99.99th=[ 4490]
bw (KB /s): min= 70, max=10009, per=100.00%, avg=2528.25, stdev=1930.08
write: io=209006KB, bw=640934B/s, iops=121, runt=333921msec
slat (usec): min=32, max=12301, avg=195.26, stdev=240.65
clat (usec): min=637, max=10893K, avg=106044.70, stdev=199408.62
lat (usec): min=699, max=10894K, avg=106239.95, stdev=199397.25
clat percentiles (msec):
| 1.00th=[ 5], 5.00th=[ 9], 10.00th=[ 13], 20.00th=[ 21],
| 30.00th=[ 29], 40.00th=[ 38], 50.00th=[ 48], 60.00th=[ 68],
| 70.00th=[ 94], 80.00th=[ 137], 90.00th=[ 265], 95.00th=[ 404],
| 99.00th=[ 742], 99.50th=[ 1106], 99.90th=[ 1811], 99.95th=[ 2008],
| 99.99th=[ 7308]
bw (KB /s): min= 3, max= 2501, per=100.00%, avg=629.21, stdev=504.36
lat (usec) : 750=0.01%, 1000=0.01%
lat (msec) : 2=0.14%, 4=0.75%, 10=5.70%, 20=12.30%, 50=32.48%
lat (msec) : 100=20.56%, 250=17.35%, 500=7.78%, 750=1.87%, 1000=0.38%
lat (msec) : 2000=0.62%, >=2000=0.06%
cpu : usr=2.10%, sys=12.88%, ctx=0, majf=0, minf=0
IO depths : 1=0.1%, 2=0.1%, 4=0.1%, 8=0.1%, 16=0.1%, 32=25.7%, >=64=74.3%
submit : 0=0.0%, 4=100.0%, 8=0.0%, 16=0.0%, 32=0.0%, 64=0.0%, >=64=0.0%
complete : 0=0.0%, 4=99.8%, 8=0.2%, 16=0.1%, 32=0.0%, 64=0.1%, >=64=0.0%
issued : total=r=159733/w=40419/d=0, short=r=0/w=0/d=0, drop=r=0/w=0/d=0
latency : target=0, window=0, percentile=100.00%, depth=64
Run status group 0 (all jobs):
READ: io=839579KB, aggrb=2514KB/s, minb=2514KB/s, maxb=2514KB/s, mint=333921m
sec, maxt=333921msec
WRITE: io=209005KB, aggrb=625KB/s, minb=625KB/s, maxb=625KB/s, mint=333921msec
, maxt=333921msec
單純看iops
writeback 和 writethrough 差不多
但文件上針對 writeback有這一句
Warn : you can loose datas in case of a powerfailure
所以看來 writethrough是比較好的選擇
2016/05/11
2016/04/17
因為ascenflow GG了
所以把認証移到forti上去
順便想看一下線上人數並記錄
但找了一下forti的mib
並沒有提供這個值
所以只好自行寫程式來撈了
使用python來撈目前online user的所有資料 並從中取出線上人數 在輸出的最後一行
直接使用shell也可以
#!/usr/bin/python
import os
import telnetlib
host="192.168.1.1"
user="admin"
passwd="password"
tn = telnetlib.Telnet(host)
tn.read_until("FG600C login: ")
tn.write(user + "\n")
tn.read_until("Password: ")
tn.write(passwd + "\n")
tn.read_until("FG600C # ")
tn.write("diagnose firewall auth filter group auth_user_group(radius_server)" + "\n")
tn.read_until("FG600C # ")
tn.write("diagnose firewall auth list" + "\n")
#tn.read_until("FG600C # ")
tn.write("exit" + "\n")
print tn.read_all()
tn.close()
2. 使用步驟1 的資料來新增data templates
3.使用步驟2 的資料來產生 graph templates
4. 在forti上新增步驟3所產生的graph template
等待一段時間後畫出的圖如下
發現有小數出現 雖然說不太會影響判讀 但感覺就是怪怪的
找了一下資料
發現把graph template的gprint type改成exact numbers就可以顯示整數了
改好後如下圖 看起來正常多了
所以把認証移到forti上去
順便想看一下線上人數並記錄
但找了一下forti的mib
並沒有提供這個值
所以只好自行寫程式來撈了
使用python來撈目前online user的所有資料 並從中取出線上人數 在輸出的最後一行
直接使用shell也可以
#!/usr/bin/python
import os
import telnetlib
host="192.168.1.1"
user="admin"
passwd="password"
tn = telnetlib.Telnet(host)
tn.read_until("FG600C login: ")
tn.write(user + "\n")
tn.read_until("Password: ")
tn.write(passwd + "\n")
tn.read_until("FG600C # ")
tn.write("diagnose firewall auth filter group auth_user_group(radius_server)" + "\n")
tn.read_until("FG600C # ")
tn.write("diagnose firewall auth list" + "\n")
#tn.read_until("FG600C # ")
tn.write("exit" + "\n")
print tn.read_all()
tn.close()
取出後把值吐給cacti來畫圖
步驟如下
1. 建立data input methods 使用自行寫好的程式
2. 使用步驟1 的資料來新增data templates
3.使用步驟2 的資料來產生 graph templates
4. 在forti上新增步驟3所產生的graph template
等待一段時間後畫出的圖如下
發現有小數出現 雖然說不太會影響判讀 但感覺就是怪怪的
找了一下資料
發現把graph template的gprint type改成exact numbers就可以顯示整數了
改好後如下圖 看起來正常多了
2016/04/06
如何使用python利用telnet指令到網路設備下指令並捉取回傳的資料
範例如下
#!/usr/bin/python
import os
import telnetlib
host="1.1.1.1"
user="abc"
passwd="password"
tn = telnetlib.Telnet(host)
tn.read_until("login: ")
tn.write(user + "\n")
tn.read_until("Password: ")
tn.write(passwd + "\n")
#read_until()到下完password 即可 接下來的指令必須一直下
#不再使用read_until() 否則最後的 print tn.read_all() 會沒有資料
tn.write("ls -al" + "\n")
tn.write("exit" + "\n")
print tn.read_all()
範例如下
#!/usr/bin/python
import os
import telnetlib
host="1.1.1.1"
user="abc"
passwd="password"
tn = telnetlib.Telnet(host)
tn.read_until("login: ")
tn.write(user + "\n")
tn.read_until("Password: ")
tn.write(passwd + "\n")
#read_until()到下完password 即可 接下來的指令必須一直下
#不再使用read_until() 否則最後的 print tn.read_all() 會沒有資料
tn.write("ls -al" + "\n")
tn.write("exit" + "\n")
print tn.read_all()
2016/04/02
有台ubuntu好久沒update了
今天要update時出現以下的訊息
W: GPG error: http://tw.archive.ubuntu.com trusty Release: The following signatures were invalid: BADSIG 40976EAF437D05B5 Ubuntu Archive Automatic Signing Key <ftpmaster@ubuntu.com>
E: Encountered a section with no Package: header
E: Problem with MergeList /var/lib/apt/lists/tw.archive.ubuntu.com_ubuntu_dists_trusty_main_i18n_Translation-en
E: The package lists or status file could not be parsed or opened.
看來好像是list有問題
找了下一下資料
用以下的方法處理後就ok了
cd /var/lib/apt
sudo mv lists lists.old
sudo mkdir -p lists/partial
sudo apt-get update
今天要update時出現以下的訊息
W: GPG error: http://tw.archive.ubuntu.com trusty Release: The following signatures were invalid: BADSIG 40976EAF437D05B5 Ubuntu Archive Automatic Signing Key <ftpmaster@ubuntu.com>
E: Encountered a section with no Package: header
E: Problem with MergeList /var/lib/apt/lists/tw.archive.ubuntu.com_ubuntu_dists_trusty_main_i18n_Translation-en
E: The package lists or status file could not be parsed or opened.
看來好像是list有問題
找了下一下資料
用以下的方法處理後就ok了
cd /var/lib/apt
sudo mv lists lists.old
sudo mkdir -p lists/partial
sudo apt-get update
2016/03/29
上週認証設備掛點
除了認証失效外
因為流量的計算也在該台上 所以quota的限制也就失效了
本來想直接撈LP的netflow資料來算
但因為會包含內部對內部的流量 所以會造成問題
因此打算用對外port mirror的資料轉成netflow來使用
fprobe
把port mirror的資料轉成netflow格式再吐出來
flow-tools
收集netflow並格式化成所需的資料
在ubuntu上直接apt-get install就好了
centos沒辦法直接yum
相關指令如下
/usr/sbin/fprobe -ieth1 -fip localhost:555
/usr/bin/flow-capture -V 5 -z 6 -n 572 -e 5000 -N -1 -w /tmp/flow 0/0/555
計算流量排名指令如下
取出超過10G下載或上傳量的ip
flow-cat /tmp/flow/`date +'%Y-%m-%d'`/ft*|flow-report -v TYPE=ip-destination-address|grep "192.168.\|10.10."|sort -rnk3 |awk '$3 > 5000000000 {print $1}'|grep -v -f /root/netflow_white_list > /tmp/netflow_quota_download
flow-cat /tmp/flow/`date +'%Y-%m-%d'`/ft*|flow-report -v TYPE=ip-source-address|grep "192.168.\|10.10."|sort -rnk3 |awk '$3 > 5000000000 {print $1}'|grep -v -f /root/netflow_white_list > /tmp/netflow_quota_upload
https://jal.tw/doku.php?id=netflow:fprobe
除了認証失效外
因為流量的計算也在該台上 所以quota的限制也就失效了
本來想直接撈LP的netflow資料來算
但因為會包含內部對內部的流量 所以會造成問題
因此打算用對外port mirror的資料轉成netflow來使用
fprobe
把port mirror的資料轉成netflow格式再吐出來
flow-tools
收集netflow並格式化成所需的資料
在ubuntu上直接apt-get install就好了
centos沒辦法直接yum
相關指令如下
/usr/sbin/fprobe -ieth1 -fip localhost:555
/usr/bin/flow-capture -V 5 -z 6 -n 572 -e 5000 -N -1 -w /tmp/flow 0/0/555
計算流量排名指令如下
取出超過10G下載或上傳量的ip
flow-cat /tmp/flow/`date +'%Y-%m-%d'`/ft*|flow-report -v TYPE=ip-destination-address|grep "192.168.\|10.10."|sort -rnk3 |awk '$3 > 5000000000 {print $1}'|grep -v -f /root/netflow_white_list > /tmp/netflow_quota_download
flow-cat /tmp/flow/`date +'%Y-%m-%d'`/ft*|flow-report -v TYPE=ip-source-address|grep "192.168.\|10.10."|sort -rnk3 |awk '$3 > 5000000000 {print $1}'|grep -v -f /root/netflow_white_list > /tmp/netflow_quota_upload
https://jal.tw/doku.php?id=netflow:fprobe
標籤:
centos,
flow-cat,
flow-report,
flow-tools,
fprobe,
netflow,
port mirror,
ubuntu
2016/03/22
為了預先解決centos 5到明天支援到期的問題
今天來把原先提供下載服務的机器升成centos 7
比較難處理的是原本提供kms認証的部分
几個跟原centos 5不同的地方記錄一下
原本apache用來ldap認証的模組換成 mod_ldap
寫法也有一些改變 範例如下 (novell 適用)
<Directory /var/www/html/test>
AuthName ldap
AuthType Basic
AuthBasicProvider ldap
AuthLDAPURL ldap://test.com.tw:389/o=users?cn?sub?(objectClass=*)
AuthLDAPBindDN "cn=user01, ou=user, ou=people, o=users"
AuthLDAPBindPassword password
Require valid-user
</Directory>
ip forword的寫法也改了
在/etc/sysctl.conf 加上
net.ipv4.ip_forward = 1
重新載入
sysctl -p /etc/sysctl.conf
http://my.oschina.net/fsxchen/blog/134601
http://superuser.com/questions/803741/how-to-enable-ip-masquerading-forwarding-on-centos-7
今天來把原先提供下載服務的机器升成centos 7
比較難處理的是原本提供kms認証的部分
几個跟原centos 5不同的地方記錄一下
原本apache用來ldap認証的模組換成 mod_ldap
寫法也有一些改變 範例如下 (novell 適用)
<Directory /var/www/html/test>
AuthName ldap
AuthType Basic
AuthBasicProvider ldap
AuthLDAPURL ldap://test.com.tw:389/o=users?cn?sub?(objectClass=*)
AuthLDAPBindDN "cn=user01, ou=user, ou=people, o=users"
AuthLDAPBindPassword password
Require valid-user
</Directory>
ip forword的寫法也改了
在/etc/sysctl.conf 加上
net.ipv4.ip_forward = 1
重新載入
sysctl -p /etc/sysctl.conf
因為需要使用apche這個身分下iptables的指令
所以要編輯 /etc/sudoers
Defaults requiretty 改為 Defaults:apache !requiretty apache不需要tty
再加上
User_Alias APACHE = apache
Cmnd_Alias FIREWALL = /sbin/iptables
APACHE ALL = (ALL) NOPASSWD: FIREWALL
原來的firewalld要停掉 改用iptables
systemctl disable firewalld
yum install -y iptables-services
systemctl enable iptables
http://my.oschina.net/fsxchen/blog/134601
http://superuser.com/questions/803741/how-to-enable-ip-masquerading-forwarding-on-centos-7
2016/03/05
最近把從mysql撈資料的程式用python改寫 之前是用php
改完後發生的第一個問題就是中文全變成了???
192.168.105.61 || 2016-03-04 00:05:05 || 2016-03-07 00:05:05 || Flow Checking ????????????(1368>????:700) to Deny this IP cannot access network
原因是從mysql撈出來時中文就亂了 所以不管之後怎麼轉碼 都沒有用了
所以必須在撈時就要指定編碼 加上下方紅色字部分
db = MySQLdb.connect(host="localhost", user="abc", passwd="pwd", db="test", charset='utf8')
但加完後網頁反而出不來了
再查了一下資料 說是要再指定sys的編碼 於是程式內必需再加入以下三行
import sys
reload(sys)
sys.setdefaultencoding('utf-8')
加完後之後的結果變成
192.168.105.61 || 2016-03-04 00:05:05 || 2016-03-07 00:05:05 || Flow Checking �訫�銝餅�����賊�蝬脰楝�輻�(1368>�𣂼��賊�:700) to Deny this IP cannot access network
看來中文有出來了 接下來是顯示的問題了 因為這個os比較久了 所以apache預設的編碼是設為big5 如果要去改會影響到其他東東 所以只能在程式加上指定編碼來處理了 比較新版本os的apache應該都預設為utf8了 應該不會碰到這個問題
print '<html>'
print '<head>'
print '<meta charset="UTF-8">'
print '</head>'
print '<body>'
print '</body>'
print '</html>'
改完後發生的第一個問題就是中文全變成了???
192.168.105.61 || 2016-03-04 00:05:05 || 2016-03-07 00:05:05 || Flow Checking ????????????(1368>????:700) to Deny this IP cannot access network
原因是從mysql撈出來時中文就亂了 所以不管之後怎麼轉碼 都沒有用了
所以必須在撈時就要指定編碼 加上下方紅色字部分
db = MySQLdb.connect(host="localhost", user="abc", passwd="pwd", db="test", charset='utf8')
但加完後網頁反而出不來了
再查了一下資料 說是要再指定sys的編碼 於是程式內必需再加入以下三行
import sys
reload(sys)
sys.setdefaultencoding('utf-8')
加完後之後的結果變成
192.168.105.61 || 2016-03-04 00:05:05 || 2016-03-07 00:05:05 || Flow Checking �訫�銝餅�����賊�蝬脰楝�輻�(1368>�𣂼��賊�:700) to Deny this IP cannot access network
看來中文有出來了 接下來是顯示的問題了 因為這個os比較久了 所以apache預設的編碼是設為big5 如果要去改會影響到其他東東 所以只能在程式加上指定編碼來處理了 比較新版本os的apache應該都預設為utf8了 應該不會碰到這個問題
print '<html>'
print '<head>'
print '<meta charset="UTF-8">'
print '</head>'
print '<body>'
print '</body>'
print '</html>'
網頁正常 搞定
192.168.105.61 || 2016-03-04 00:05:05 || 2016-03-07 00:05:05 || Flow Checking 違反主機連線數量網路政策(1368>限制數量:700) to Deny this IP cannot access network
完整程式碼如下
#!/usr/bin/python
# -*- coding: utf-8 -*-
print "Content-type: text/html"
print
# 引入 MySQL 模組
import MySQLdb
#引入 sys 並指定sys為utf-8編碼
import sys
reload(sys)
sys.setdefaultencoding('utf-8')
# 連接 MySQL
db = MySQLdb.connect(host="localhost", user="abc", passwd="pwd", db="test", charset='utf8')
cursor = db.cursor()
# 執行 SQL
cursor.execute("select ip from table;")
result = cursor.fetchall()
# 輸出結果
a=0
for record in result:
if (a%2)==1:
print "<FONT COLOR=FF0000>"
else:
print "<FONT COLOR=000000>"
print record[0]
print "<br>"
print "<br>"
a=a+1
db.close()
最近在ubuntu 32 位元 開啟chrome時都會出現不在支援此版本的作業系統
表示以後不再支援32位元的版本了
今天要update時出現
W: 無法取得 http://dl.google.com/linux/chrome/deb/dists/stable/Release,在 Release 檔案找不到要有的「main/binary-i386/Packages」項目 (sources.list 項目有問題或檔案格式不對)
可是連64位元的os都出現 XD
要修正一下 source list
sudo sed -i -e 's/deb http/deb [arch=amd64] http/' "/etc/apt/sources.list.d/google-chrome.list"
表示以後不再支援32位元的版本了
今天要update時出現
W: 無法取得 http://dl.google.com/linux/chrome/deb/dists/stable/Release,在 Release 檔案找不到要有的「main/binary-i386/Packages」項目 (sources.list 項目有問題或檔案格式不對)
可是連64位元的os都出現 XD
要修正一下 source list
sudo sed -i -e 's/deb http/deb [arch=amd64] http/' "/etc/apt/sources.list.d/google-chrome.list"
2016/03/04
2016/02/29
關於如何在網頁上執行python目前找到二個方法
一個是在apache中載入module
有二個module可以用
http://modpython.org/
https://code.google.com/archive/p/modwsgi/
根據一般的說法是wsgi的效能會比modpython好二倍以上
使用方式是在apache啟動時載入模組
另一個方式是採用cgi
直接把寫好的python放在 /var/www/cgi-bin/下
在程式碼的最前面加上
print "Content-type: text/html"
print
這樣就能直接用了
bash perl 也是相同的方法
目前先採用cgi的方式
http://blog.xuite.net/autosun/study/42871538-%5BUbuntu%5D+%E5%AE%89%E8%A3%9D+Apache2+%2B+Python+%2B+MySQL
一個是在apache中載入module
有二個module可以用
http://modpython.org/
https://code.google.com/archive/p/modwsgi/
根據一般的說法是wsgi的效能會比modpython好二倍以上
使用方式是在apache啟動時載入模組
另一個方式是採用cgi
直接把寫好的python放在 /var/www/cgi-bin/下
在程式碼的最前面加上
print "Content-type: text/html"
這樣就能直接用了
bash perl 也是相同的方法
目前先採用cgi的方式
http://blog.xuite.net/autosun/study/42871538-%5BUbuntu%5D+%E5%AE%89%E8%A3%9D+Apache2+%2B+Python+%2B+MySQL
2016/02/24
2016/02/20
昨天發現有几台brocade的fan壞了
本來在crontab是有寫檢查fail及error的script
但因為brocade 在log上會一直出現fan
因為會一直變換轉速
所以之前拿掉了 因為量太大
這次再加回去
grep Fan|grep fail
但要撈log時 使用cut時發現一個問題
當每個月的10號之前
會有二個空格
Apr 9 19:37:20 192.168.204.251 System: Fan 1 (from left when facing right side), failed
Apr和9間就有二個空格
如此便會影使用cut取值的正確
為了要解決這個問題
使用一次 tr 就好了
tr -s ' ' 這樣就可以把空格全部壓縮成一個
本來在crontab是有寫檢查fail及error的script
但因為brocade 在log上會一直出現fan
因為會一直變換轉速
所以之前拿掉了 因為量太大
這次再加回去
grep Fan|grep fail
但要撈log時 使用cut時發現一個問題
當每個月的10號之前
會有二個空格
Apr 9 19:37:20 192.168.204.251 System: Fan 1 (from left when facing right side), failed
Apr和9間就有二個空格
如此便會影使用cut取值的正確
為了要解決這個問題
使用一次 tr 就好了
tr -s ' ' 這樣就可以把空格全部壓縮成一個
2016/02/17
今天在config centos 7的vsftpd
主要几個地方
不允許anonymous
anonymous_enable=NO
限制user只能在自己的home目錄
chroot_local_user=YES
chroot_list_enable=YES
chroot_list_file=/etc/vsftpd/chroot_list
在 /etc/vsftpd 產生一個 chroot_list 檔案
touch chroot_list
改完後 systemctl restart vsftpd
但要登入時發生
500 OOPS: vsftpd: refusing to run with writable root inside chroot()
找了半天資料 罵聲一片
最後才找到新版要再多加一行
allow_writeable_chroot=YES
加完重啟就ok了
無言
主要几個地方
不允許anonymous
anonymous_enable=NO
限制user只能在自己的home目錄
chroot_local_user=YES
chroot_list_enable=YES
chroot_list_file=/etc/vsftpd/chroot_list
在 /etc/vsftpd 產生一個 chroot_list 檔案
touch chroot_list
改完後 systemctl restart vsftpd
但要登入時發生
500 OOPS: vsftpd: refusing to run with writable root inside chroot()
找了半天資料 罵聲一片
最後才找到新版要再多加一行
allow_writeable_chroot=YES
加完重啟就ok了
無言
2016/02/16
2016/02/15
今天本來是要升級OCS
但升到2.2後畫面竟然只有几個數字
而且升級的過程一直不順
想說重裝好了
因為原來是裝在centos 5上
而centos 5 的EOL是2017年3 月
所以試看看裝在centos 7 會不會比較沒問題
查了一下
現在在centos 7 上裝很簡單了
稍微記錄一下
最小安裝後改一下hosts.allow hosts.deny 及selinux
關掉filewalld
systemctl stop firewalld
systemctl disable firewalld
再裝一下net-tools及 epel-release
epel-release是用來加入額外repo
安裝mariadb
yum install mariadb-server -y
systemctl start mariadb
systemctl enable mariadb
修改mariadb的root密碼及一些安全設定
mysql_secure_installation
再來安裝ocs
yum install -y ocsinventory-server ocsinventory-reports
因為加入了epel-release 所以系統會把所有相依性的套件一次裝好
啟動httpd服務
systemctl start httpd
sytemctl enable httpd
接下來就可以進入web介面 依畫面指示進行接下來的安裝動作了
http://ocs-server-ip/ocsreports/
預設登入帳號密碼是 admin/admin 記得要改
修改server ip 使用文字化圖形介面指令
nmtui
目前的版本是2.1.2
再等一陣子看看 應該會直接升到 2.2 到時直接使用yum update就好了
但升到2.2後畫面竟然只有几個數字
而且升級的過程一直不順
想說重裝好了
因為原來是裝在centos 5上
而centos 5 的EOL是2017年3 月
所以試看看裝在centos 7 會不會比較沒問題
查了一下
現在在centos 7 上裝很簡單了
稍微記錄一下
最小安裝後改一下hosts.allow hosts.deny 及selinux
關掉filewalld
systemctl stop firewalld
systemctl disable firewalld
再裝一下net-tools及 epel-release
epel-release是用來加入額外repo
安裝mariadb
yum install mariadb-server -y
systemctl start mariadb
systemctl enable mariadb
修改mariadb的root密碼及一些安全設定
mysql_secure_installation
再來安裝ocs
yum install -y ocsinventory-server ocsinventory-reports
因為加入了epel-release 所以系統會把所有相依性的套件一次裝好
啟動httpd服務
systemctl start httpd
sytemctl enable httpd
接下來就可以進入web介面 依畫面指示進行接下來的安裝動作了
http://ocs-server-ip/ocsreports/
預設登入帳號密碼是 admin/admin 記得要改
修改server ip 使用文字化圖形介面指令
nmtui
目前的版本是2.1.2
再等一陣子看看 應該會直接升到 2.2 到時直接使用yum update就好了
2016/01/11
昨天看到這個工具還不錯 fastnetmon
https://github.com/pavel-odintsov/fastnetmon
可以使用netflow sflow port mirror的資料來計算pps mbps 及flow數
當到達指定的上限時
可以發出告警或執行特定動作
安裝很簡單
裝好centos 7後
wget https://raw.githubusercontent.com/pavel-odintsov/fastnetmon/master/src/fastnetmon_install.pl -Ofastnetmon_install.pl
perl fastnetmon_install.pl
會自動把需要的套件補齊
裝好後依需求修改 /etc/fastnetmon.conf
另外在/tmp找到notify_about_attack.sh
cp到/usr/local/bin/ 一樣依需求修改內容
如果使用port mirror 要把網卡的 promisc打開
寫入 /etc/rc.local
/usr/sbin/ifconfig eth1 promisc
再來設定開机執行 fastnetmon
systemctl enable fastnetmon
以下的程式可以觀看即時的狀況
/opt/fastnetmon/fastnetmon_client
https://github.com/pavel-odintsov/fastnetmon
可以使用netflow sflow port mirror的資料來計算pps mbps 及flow數
當到達指定的上限時
可以發出告警或執行特定動作
安裝很簡單
裝好centos 7後
wget https://raw.githubusercontent.com/pavel-odintsov/fastnetmon/master/src/fastnetmon_install.pl -Ofastnetmon_install.pl
perl fastnetmon_install.pl
會自動把需要的套件補齊
裝好後依需求修改 /etc/fastnetmon.conf
另外在/tmp找到notify_about_attack.sh
cp到/usr/local/bin/ 一樣依需求修改內容
如果使用port mirror 要把網卡的 promisc打開
寫入 /etc/rc.local
/usr/sbin/ifconfig eth1 promisc
再來設定開机執行 fastnetmon
systemctl enable fastnetmon
以下的程式可以觀看即時的狀況
/opt/fastnetmon/fastnetmon_client
標籤:
centos 7,
fastnetmon,
netflow,
port mirror,
promiscuous,
sflow,
systemctl
2015/12/14
最近因為要SDN的POC
廠商要求測試的主机要有二張網卡
一張要開啟promiscuous mode 用來聽所有對外的封包
本來是想放在vm上
但之前要把snort及其他網管軟体移進vm時也一直在找相關的資料
那時就沒找到要如何解決
因為在guest裡就是看不到所有的封包
上週也到proxmox的官方forum上去問
過了好几天也沒人回文
昨天終於找到解決方法了
原來這麼解單
把網卡的bridge設為HUB mode就好了
指令如下
brctl setageing vmbr1 0
順便來去官網自我回文
廠商要求測試的主机要有二張網卡
一張要開啟promiscuous mode 用來聽所有對外的封包
本來是想放在vm上
但之前要把snort及其他網管軟体移進vm時也一直在找相關的資料
那時就沒找到要如何解決
因為在guest裡就是看不到所有的封包
上週也到proxmox的官方forum上去問
過了好几天也沒人回文
昨天終於找到解決方法了
原來這麼解單
把網卡的bridge設為HUB mode就好了
指令如下
brctl setageing vmbr1 0
順便來去官網自我回文
20240301 修正
以上所述下指令的方式在proxmox 8版沒作用了
要修改以下檔案
重開才能生效
/etc/network/interfaces
把listen的介面加上
bridge_ageing 0
範例如下
auto vmbr1
iface vmbr1 inet manual
bridge-ports ens1f1
bridge-stp off
bridge-fd 0
bridge_ageing 0
重開才能生效
2015/12/10
2015/12/04
最近開始直接向各國回報攻擊我們的ip
今天終於有一個國家回信 是日本
好感動
請我再提供log的時區及純文字檔
snort base 無法直接匯出
記錄一下sql語法
select event.cid,signature,sig_name,inet_ntoa(iphdr.ip_src),tcphdr.tcp_sport,inet_ntoa(iphdr.ip_dst),tcphdr.tcp_dport,timestamp from iphdr,event,signature,tcphdr where event.signature=signature.sig_id and event.cid=iphdr.cid and event.cid=tcphdr.cid and event.timestamp like '2015-12-04%' and inet_ntoa(iphdr.ip_src)="133.208.26.134" into outfile '/tmp/133.208.26.134.log';
事件的唯一值是 event裡的cid 其他table都要參考這個值
iphdr 放的是ip資料
tcphdr 放的是tcp的相關port 資料
udphdr 放的是udp的相關port 資料
今天終於有一個國家回信 是日本
好感動
請我再提供log的時區及純文字檔
snort base 無法直接匯出
記錄一下sql語法
select event.cid,signature,sig_name,inet_ntoa(iphdr.ip_src),tcphdr.tcp_sport,inet_ntoa(iphdr.ip_dst),tcphdr.tcp_dport,timestamp from iphdr,event,signature,tcphdr where event.signature=signature.sig_id and event.cid=iphdr.cid and event.cid=tcphdr.cid and event.timestamp like '2015-12-04%' and inet_ntoa(iphdr.ip_src)="133.208.26.134" into outfile '/tmp/133.208.26.134.log';
事件的唯一值是 event裡的cid 其他table都要參考這個值
iphdr 放的是ip資料
tcphdr 放的是tcp的相關port 資料
udphdr 放的是udp的相關port 資料
2015/12/02
2015/11/19
2015/10/29
2015/10/26
2015/10/21
今天在思考一個問題
要不要把google的ip全部設成白名單
但首先要取得google的全部ip
指令如下
nslookup -q=TXT _netblocks.google.com 8.8.8.8
目前得到的資料如下
nslookup -q=TXT _netblocks.google.com 8.8.8.8
Server: 8.8.8.8
Address: 8.8.8.8#53
Non-authoritative answer:
_netblocks.google.com text = "v=spf1 ip4:64.18.0.0/20 ip4:64.233.160.0/19 ip4:66.102.0.0/20 ip4:66.249.80.0/20 ip4:72.14.192.0/18 ip4:74.125.0.0/16 ip4:108.177.8.0/21 ip4:173.194.0.0/16 ip4:207.126.144.0/20 ip4:209.85.128.0/17 ip4:216.58.192.0/19 ip4:216.239.32.0/19 ~all"
http://itindex.net/detail/50310-google-ip-%E6%96%B9%E6%B3%95
要不要把google的ip全部設成白名單
但首先要取得google的全部ip
指令如下
nslookup -q=TXT _netblocks.google.com 8.8.8.8
目前得到的資料如下
nslookup -q=TXT _netblocks.google.com 8.8.8.8
Server: 8.8.8.8
Address: 8.8.8.8#53
Non-authoritative answer:
_netblocks.google.com text = "v=spf1 ip4:64.18.0.0/20 ip4:64.233.160.0/19 ip4:66.102.0.0/20 ip4:66.249.80.0/20 ip4:72.14.192.0/18 ip4:74.125.0.0/16 ip4:108.177.8.0/21 ip4:173.194.0.0/16 ip4:207.126.144.0/20 ip4:209.85.128.0/17 ip4:216.58.192.0/19 ip4:216.239.32.0/19 ~all"
http://itindex.net/detail/50310-google-ip-%E6%96%B9%E6%B3%95
2015/10/20
2015/10/14
為了上win10的kms
今天把kms從win7移到win server 2012 r2
測試了原來在win7 win8上使用的bat檔可以直接用沒問題
再來就是office 2016
不管怎麼寫就是會有問題
上網找了一下
有些人說是編碼的問題
有些人說是編輯器的問題
最後試的結果是
word notepad都不行 不管用什麼編碼
notepad++不管用什麼編碼都沒問題
XD
office 2016 kms認証bat檔內容如下
需要的自行取用
記得要改kms server的ip
@echo off
set OfficePath="C:\Program Files\Microsoft Office\Office16\"
if exist "C:\Program Files (x86)\Microsoft Office\Office16\ospp.vbs" set OfficePath="C:\Program Files (x86)\Microsoft Office\Office16\"
cscript %OfficePath%ospp.vbs /sethst:1.2.3.4
cscript %OfficePath%ospp.vbs /setprt:1688
cscript %OfficePath%ospp.vbs /act
echo active is success when you see "<Product activation successful>"
pause
2015/10/07
proxmox 4.0 經過很久的beta 終於 release了
主要有三個功能
bash這個因為我一直都使用ssh 所以沒啥感覺
再來是用LXC取代openvz了
因為我之前也不用openvz
試了一下LXC 感覺上真的快很多
但有個問題
backup目前不能使用snapshot
意思就是備份時要停机
這個我就有點意見了 雖然官方說會改進
再來就是HA的config更簡便了
這個我之前也沒在用
升級之後應該會有這個需求
最重要的是3.x可以用到什麼時候
The Proxmox VE 3.x family is supported until the end of Debian Wheezy security updates (expected end in April 2016)
還有半年
不過官方的建議升級是backup guest
install 新的 再restore guest
再找看看有沒机器和時間來做了
主要有三個功能
bash這個因為我一直都使用ssh 所以沒啥感覺
再來是用LXC取代openvz了
因為我之前也不用openvz
試了一下LXC 感覺上真的快很多
但有個問題
backup目前不能使用snapshot
意思就是備份時要停机
這個我就有點意見了 雖然官方說會改進
再來就是HA的config更簡便了
這個我之前也沒在用
升級之後應該會有這個需求
最重要的是3.x可以用到什麼時候
The Proxmox VE 3.x family is supported until the end of Debian Wheezy security updates (expected end in April 2016)
還有半年
不過官方的建議升級是backup guest
install 新的 再restore guest
再找看看有沒机器和時間來做了
2015/09/27
最近因為有需求買了一支usb 的 nic
用的是 rtl 8150的晶片
http://www.realtek.com/products/productsView.aspx?Langid=1&PFid=8&Level=5&Conn=4&ProdID=21
在win10上用沒几分鐘就GG了
本來以為是壞掉了
可是在win7上測試又能正常使用
打電話去realtek詢問的結果是
win10上只能使用rtl 8152或 rtl 8153
rtl 8150不支援 Orz
http://www.realtek.com/downloads/downloadsView.aspx?Langid=1&PNid=56&PFid=56&Level=5&Conn=4&DownTypeID=3&GetDown=false#RTL8153
沒法度了 因為趕著用
只好上 pchome 買了一支 pqi air pen express 來用
http://tw.pqigroup.com/prod_in.aspx?mnuid=1169&modid=85&prodid=567
晚上訂 隔天中午就到貨了
用的是 rtl 8150的晶片
http://www.realtek.com/products/productsView.aspx?Langid=1&PFid=8&Level=5&Conn=4&ProdID=21
在win10上用沒几分鐘就GG了
本來以為是壞掉了
可是在win7上測試又能正常使用
打電話去realtek詢問的結果是
win10上只能使用rtl 8152或 rtl 8153
rtl 8150不支援 Orz
http://www.realtek.com/downloads/downloadsView.aspx?Langid=1&PNid=56&PFid=56&Level=5&Conn=4&DownTypeID=3&GetDown=false#RTL8153
沒法度了 因為趕著用
只好上 pchome 買了一支 pqi air pen express 來用
http://tw.pqigroup.com/prod_in.aspx?mnuid=1169&modid=85&prodid=567
晚上訂 隔天中午就到貨了
2015/09/13
昨天跳電
firewall又出了一些問題
導致網路內對外沒問題 但外對內不通
因此想找一個外對內監控的方法
找到了利用google drive就能直接使用
滿方便的
http://www.labnol.org/internet/website-uptime-monitor/21060/
firewall又出了一些問題
導致網路內對外沒問題 但外對內不通
因此想找一個外對內監控的方法
找到了利用google drive就能直接使用
滿方便的
http://www.labnol.org/internet/website-uptime-monitor/21060/
2015/09/08
在ubuntu 中
影像處理相關軟体 包含轉檔 加字幕 合併等
Avidemux
http://www.wmfield.idv.tw/532
處理字幕相關軟體
Aegisub
http://www.ubuntu-tw.org/modules/newbb/viewtopic.php?topic_id=79092
影像處理相關軟体 包含轉檔 加字幕 合併等
Avidemux
http://www.wmfield.idv.tw/532
處理字幕相關軟體
Aegisub
http://www.ubuntu-tw.org/modules/newbb/viewtopic.php?topic_id=79092
2015/08/29
原來python打包成exe有三個工具
cx_freeze
py2exe
PyInstaller
之前一直使用的是py2exe
看來cx_freeze也不錯用
下次試看看
http://keliang.blog.51cto.com/3359430/661884
cx_freeze
py2exe
PyInstaller
之前一直使用的是py2exe
看來cx_freeze也不錯用
下次試看看
http://keliang.blog.51cto.com/3359430/661884
2015/08/24
2015/08/23
當完全找不到分割區時
可使用以下工具找看看
分割區救回工具
http://www.cgsecurity.org/wiki/TestDisk
當分割區沒問題 但有軌壞資料無法全部讀取或讀到一半當机時
可使用以下工具試試
壞軌資料救回工具
執行 ddrescue 時必須以分割區下指令不能是整個HD
否則無法mount img來用
ddrescue /dev/sdb1 /tmp/sdb1.img
不能是 ddrescue /dev/sdb /tmp/sdb.img
如要使用image
mount /tmp/sdb1.img /mnt
http://www.gnu.org/software/ddrescue/
誤刪檔救回工具
http://www.cgsecurity.org/wiki/PhotoRec
可使用以下工具找看看
分割區救回工具
http://www.cgsecurity.org/wiki/TestDisk
當分割區沒問題 但有軌壞資料無法全部讀取或讀到一半當机時
可使用以下工具試試
壞軌資料救回工具
執行 ddrescue 時必須以分割區下指令不能是整個HD
否則無法mount img來用
ddrescue /dev/sdb1 /tmp/sdb1.img
不能是 ddrescue /dev/sdb /tmp/sdb.img
如要使用image
mount /tmp/sdb1.img /mnt
http://www.gnu.org/software/ddrescue/
誤刪檔救回工具
http://www.cgsecurity.org/wiki/PhotoRec
2015/08/20
昨天上課時臨時需要xp
想說把virtualbox的guest匯出直接co給別人匯入比較快
想不到匯入後竟然開不了機 出現以下訊息
但同樣的檔在ubuntu中匯入卻沒問題
依字面上來看是有相同名字的node所以無法開机
但就只有一台啊XD
以這個message去找 也找不到什麼東東
只好自己試了 把設定值一個一個取消試看看
試到最後
在usb的選項把啟用usb取消勾選後
會出現偵測到無效的設定值的訊息
不管他
直接按確定
系統會自動再加回去
但是
這樣再開机就沒問題了吔
見鬼了
是七月沒拜拜嗎
另外 host guest 間的檔案拖放 在不同的 os 中有不同的結果
目前還是先用 共用資料夾 比較沒問題
想說把virtualbox的guest匯出直接co給別人匯入比較快
想不到匯入後竟然開不了機 出現以下訊息
但同樣的檔在ubuntu中匯入卻沒問題
依字面上來看是有相同名字的node所以無法開机
但就只有一台啊XD
以這個message去找 也找不到什麼東東
只好自己試了 把設定值一個一個取消試看看
試到最後
在usb的選項把啟用usb取消勾選後
會出現偵測到無效的設定值的訊息
不管他
直接按確定
系統會自動再加回去
但是
這樣再開机就沒問題了吔
見鬼了
是七月沒拜拜嗎
另外 host guest 間的檔案拖放 在不同的 os 中有不同的結果
目前還是先用 共用資料夾 比較沒問題
2015/08/19
2015/08/11
honeyd大約測了一週 看來是沒啥問題
只好在 root 的 home下寫一個 .bash_logout
在關机前把相關的process kill 掉
寫一個script
kill_process
在關机前把相關的process kill 掉
#!/bin/bash
for i in `pidof farpd`
do
kill -9 $i
done
kill -9 `pidof honeyd`
再把這個script放在
/etc/systemd/system/reboot.target.wants/hwclock-save.service裡
[Service]
Type=oneshot
ExecStart=/sbin/hwclock -D --systohc
ExecStart=/root/kill_process
不知道這樣到底對不對 有沒有什麼潛在的問題 目前有作用就是了
20160217 後記
今天apt-get update後要reboot時又沒法關机了
發現寫進去的東東被洗掉了
再找了一次資料
發現一個很簡單的解法
把/lib/systemd/system/rc-local.service原本的timeout改一下就好了
原本預設為0所以是unlimit改為5問題就解決了 timeout時間一到机器就會關了 不會再一直等
[Unit]
Description=/etc/rc.local Compatibility
[Service]
Type=oneshot
ExecStart=/etc/rc.local
TimeoutSec=5
StandardInput=tty
RemainAfterExit=yes
[Install]
WantedBy=multi-user.target
也不知為什麼honeyd.log變成binary file了
grep要加上-a才會正常
grep -a "123" /var/log/honeypot/honeyd.log
但因為之前是直接下載iso回來用 使用的是ubuntu 12.04 有點舊
想說直接換成debian好了 目前是 8.1
只要在
/etc/apt/source.list
加上
deb http://ftp.us.debian.org/debian squeeze main
apt-get udpate
apt-get install honeyd
就可以了
但裝完後一直不能啟動
原來是要把 /etc/default/honeyd的 RUN="no"改成RUN="yes"
再把NETWORK mark 掉
雖然systemctl start honeyd 時有error 但process 還是有起來
不能enable就是了
沒想到關机出現問題
要重開時一直出現
a stop job is running for /etc/rc.local compatibility
而關不了机
還是第一次碰到這個問題
看來是因為把farpd及honeyd寫到/etc/rc.local後造成的
20160217 後記
今天apt-get update後要reboot時又沒法關机了
發現寫進去的東東被洗掉了
再找了一次資料
發現一個很簡單的解法
把/lib/systemd/system/rc-local.service原本的timeout改一下就好了
原本預設為0所以是unlimit改為5問題就解決了 timeout時間一到机器就會關了 不會再一直等
[Unit]
Description=/etc/rc.local Compatibility
[Service]
Type=oneshot
ExecStart=/etc/rc.local
TimeoutSec=5
StandardInput=tty
RemainAfterExit=yes
[Install]
WantedBy=multi-user.target
接下來要把捉到的ip進行處理了
在debian中要取honeyd.log時出現error
grep "123" /var/log/honeypot/honeyd.log
Binary file /var/log/honeypot/honeyd.log matches
在debian中要取honeyd.log時出現error
grep "123" /var/log/honeypot/honeyd.log
Binary file /var/log/honeypot/honeyd.log matches
也不知為什麼honeyd.log變成binary file了
grep要加上-a才會正常
grep -a "123" /var/log/honeypot/honeyd.log
2015/08/06
2015/08/04
2015/08/03
最近忽然想玩一下honeypot
找了一下
好像都沒什麼新的project
只有看到honeyd好像還滿多人用的
不過也好久沒更新了
另外有一個honeydrive是利用xubuntu 12.04 為base裝了十個honeypot的軟体
所以決定用這個
iso裝好後首先要修改honeyd.conf
範例如下
create linux
set linux personality "Linux 2.4.7 (X86)"
add linux tcp port 25 "/usr/share/honeyd/scripts/unix/general/smtp.pl"
add linux tcp port 110 "/usr/share/honeyd/scripts/unix/general/pop/pop3.sh"
set linux default tcp action reset
set linux uid 32767 gid 32767
bind 192.168.1.1 linux
create windows
set windows personality "Microsoft Windows 2000 SP3"
add windows tcp port 80 "/usr/share/honeyd/scripts/win32/web.sh"
add windows tcp port 135 open
set windows default tcp action reset
set windows default udp action block
set windows uid 32767 gid 32767
bind 192.168.1.2 windows
service honeyd restart
再來就是要執行farpd 這樣才能讓bind的ip生效
語法如下
farpd 192.168.1.1-192.168.1.2
或
farpd 192.168.1.1/24
如果ip不連續
就要多執行几次
farpd 192.168.1.1
farpd 192.168.1.2
可以用nmap測一下
等個几天再來看看log
http://www.honeyd.org/
http://sourceforge.net/projects/honeydrive/
http://tiserle.blogspot.tw/2011/06/honeyd.html
找了一下
好像都沒什麼新的project
只有看到honeyd好像還滿多人用的
不過也好久沒更新了
另外有一個honeydrive是利用xubuntu 12.04 為base裝了十個honeypot的軟体
所以決定用這個
iso裝好後首先要修改honeyd.conf
範例如下
create linux
set linux personality "Linux 2.4.7 (X86)"
add linux tcp port 25 "/usr/share/honeyd/scripts/unix/general/smtp.pl"
add linux tcp port 110 "/usr/share/honeyd/scripts/unix/general/pop/pop3.sh"
set linux default tcp action reset
set linux uid 32767 gid 32767
bind 192.168.1.1 linux
create windows
set windows personality "Microsoft Windows 2000 SP3"
add windows tcp port 80 "/usr/share/honeyd/scripts/win32/web.sh"
add windows tcp port 135 open
set windows default tcp action reset
set windows default udp action block
set windows uid 32767 gid 32767
bind 192.168.1.2 windows
service honeyd restart
再來就是要執行farpd 這樣才能讓bind的ip生效
語法如下
farpd 192.168.1.1-192.168.1.2
或
farpd 192.168.1.1/24
如果ip不連續
就要多執行几次
farpd 192.168.1.1
farpd 192.168.1.2
可以用nmap測一下
等個几天再來看看log
http://www.honeyd.org/
http://sourceforge.net/projects/honeydrive/
http://tiserle.blogspot.tw/2011/06/honeyd.html
2015/07/30
昨天下午17點多發生一台cisco不明原因的網路不通
早上去查了一下
找不到原因
只好把昨天早上的config 備份倒回去
說也奇怪 就正常了
到了今天中午
宿舍的4台cisco一起出問題
查了一下log如下
Jul 30 11:10:27 GMT+8: %ACL_ERRMSG-4-UNLOADED: 1 fed: Output IP Vlan ACL on interface Vlan206 for label 3 on asic255 could not be programmed in hardware and traffic will be dropped.
Jul 30 11:10:27 GMT+8: %ACL_ERRMSG-4-UNLOADED: 1 fed: Output IP Vlan ACL on interface Vlan207 for label 3 on asic255 could not be programmed in hardware and traffic will be dropped.
Jul 30 11:10:27 GMT+8: %ACL_ERRMSG-4-UNLOADED: 1 fed: Output IP Vlan ACL on interface Vlan208 for label 3 on asic255 could not be programmed in hardware and traffic will be dropped.
Jul 30 11:10:27 GMT+8: %ACL_ERRMSG-4-UNLOADED: 1 fed: Output IP Vlan ACL on interface Vlan209 for label 3 on asic255 could not be programmed in hardware and traffic will be dropped.
Jul 30 11:10:27 GMT+8: %ACL_ERRMSG-4-UNLOADED: 1 fed: Output IP Vlan ACL on interface Vlan210 for label 3 on asic255 could not be programmed in hardware and traffic will be dropped.
詢問廠商後得到這樣的回答
原廠對3850/3650 ACL限制的說明,
ACL TCAM (TAQ)有2塊,分別為in與out,但VACL只能使用其中1塊.限制如下:
1.VACL => 1.5K 筆 (最多,不分in,out)
2.MAC VACL => 單向460筆(in,out分開算)
3.IPv4 VACL => 單向690筆(in,out分開算)
4.IPv4 PACL,RACL => 單向1380筆(in,out分開算)
5.MAC PACL,RACL =>單向690筆(in,out分開算)
6.IPv6 PACL,RACL =>單向690筆(in,out分開算)
VLAN Access Control List (VACL) − A VACL is an ACL that is applied to a VLAN. It can only be applied to a VLAN and no other type of interface. The security boundary is to permit or deny traffic that moves between VLANs and permit or deny traffic within a VLAN. The VLAN ACL is supported in hardware, and has no effect on the performance.
Port Access Control List (PACL) − A PACL is an ACL applied to a Layer 2 switchport interface. The security boundary is to permit or deny traffic within a VLAN. The PACL is supported in hardware and has no effect on the performance.
Router ACL (RACL) − An RACL is an ACL that is applied to an interface that has a Layer 3 address assigned to it. It can be applied to any port that has an IP address such as routed interfaces, loopback interfaces, and VLAN interfaces. The security boundary is to permit or deny traffic that moves between subnets or n
意思就是說當acl下超過690條後 机器就會不正常了
XD
cisco吔
為什麼以前都沒發生過咧
不知是因為最近snort升到 2.9.7.5 所以 port scan變的比較敏感
還是port scan真的變多了
反正先改了一下程式
要block的ip直接下到fortiget而不先進LP了
看來也沒啥好方法可以處理了
早上去查了一下
找不到原因
只好把昨天早上的config 備份倒回去
說也奇怪 就正常了
到了今天中午
宿舍的4台cisco一起出問題
查了一下log如下
Jul 30 11:10:27 GMT+8: %ACL_ERRMSG-4-UNLOADED: 1 fed: Output IP Vlan ACL on interface Vlan206 for label 3 on asic255 could not be programmed in hardware and traffic will be dropped.
Jul 30 11:10:27 GMT+8: %ACL_ERRMSG-4-UNLOADED: 1 fed: Output IP Vlan ACL on interface Vlan207 for label 3 on asic255 could not be programmed in hardware and traffic will be dropped.
Jul 30 11:10:27 GMT+8: %ACL_ERRMSG-4-UNLOADED: 1 fed: Output IP Vlan ACL on interface Vlan208 for label 3 on asic255 could not be programmed in hardware and traffic will be dropped.
Jul 30 11:10:27 GMT+8: %ACL_ERRMSG-4-UNLOADED: 1 fed: Output IP Vlan ACL on interface Vlan209 for label 3 on asic255 could not be programmed in hardware and traffic will be dropped.
Jul 30 11:10:27 GMT+8: %ACL_ERRMSG-4-UNLOADED: 1 fed: Output IP Vlan ACL on interface Vlan210 for label 3 on asic255 could not be programmed in hardware and traffic will be dropped.
詢問廠商後得到這樣的回答
原廠對3850/3650 ACL限制的說明,
ACL TCAM (TAQ)有2塊,分別為in與out,但VACL只能使用其中1塊.限制如下:
1.VACL => 1.5K 筆 (最多,不分in,out)
2.MAC VACL => 單向460筆(in,out分開算)
3.IPv4 VACL => 單向690筆(in,out分開算)
4.IPv4 PACL,RACL => 單向1380筆(in,out分開算)
5.MAC PACL,RACL =>單向690筆(in,out分開算)
6.IPv6 PACL,RACL =>單向690筆(in,out分開算)
VLAN Access Control List (VACL) − A VACL is an ACL that is applied to a VLAN. It can only be applied to a VLAN and no other type of interface. The security boundary is to permit or deny traffic that moves between VLANs and permit or deny traffic within a VLAN. The VLAN ACL is supported in hardware, and has no effect on the performance.
Port Access Control List (PACL) − A PACL is an ACL applied to a Layer 2 switchport interface. The security boundary is to permit or deny traffic within a VLAN. The PACL is supported in hardware and has no effect on the performance.
Router ACL (RACL) − An RACL is an ACL that is applied to an interface that has a Layer 3 address assigned to it. It can be applied to any port that has an IP address such as routed interfaces, loopback interfaces, and VLAN interfaces. The security boundary is to permit or deny traffic that moves between subnets or n
意思就是說當acl下超過690條後 机器就會不正常了
XD
cisco吔
為什麼以前都沒發生過咧
不知是因為最近snort升到 2.9.7.5 所以 port scan變的比較敏感
還是port scan真的變多了
反正先改了一下程式
要block的ip直接下到fortiget而不先進LP了
看來也沒啥好方法可以處理了
2015/07/28
2015/07/22
雖然網路上已經有很多關於使用ssh不用打密碼的教學文章
還是稍微記一下好了
先在client和server使用者的home目錄下建立.ssh的目錄
在client的机器中執行以下指令
ssh-keygen -t rsa 或 ssh-keygen -t dsa
dsa rsa 是二種不同的加密方式 就看要選擇那一種
之後按個几次enter
會在.ssh這個目錄內產生一對檔案
id_dsa
id_dsa.pub
或
id_rsa
id_rsa.pub
接下來把.pub那個檔案傳到要連線的server上
scp id_rsa.pub server_ip:~/.ssh/
再連到server上執行
cat .ssh/id_rsa.pub >> .ssh/authorized_keys
exit後再次連到server就無需再打密碼了
若有很多的client端key要放到server上
只要把pub檔附加到authorized_keys即可
cat .ssh/id_rsa.pub >> .ssh/authorized_keys
server端 修改 /etc/ssh/sshd_config
某些os可能不接受dsa的key而無法登入 此時就要換用rsa
server端 修改 /etc/ssh/sshd_config
PasswordAuthentication no
PubkeyAuthentication yes
如果要開放 root login
PermitRootLogin prohibit-password
改為:
PermitRootLogin yes
2015/07/21
2015/07/15
又到了每半年一次要使用openvas的時間
果不其然 又出問題了
決定以後要用再下vm 回來就好了
不想再裝了
vm使用的是debian
跑在virtualbox上還ok
跑完後因為報表只需要High跟Medium
所以在用ip sort後要再改 levels=hm 才符合需求
整個filter的條件如下
sort=host first=1 result_hosts_only=1 min_cvss_base= min_qod= levels=hm autofp=0 notes=1 overrides=1 rows=100 delta_states=gn
果不其然 又出問題了
決定以後要用再下vm 回來就好了
不想再裝了
vm使用的是debian
跑在virtualbox上還ok
跑完後因為報表只需要High跟Medium
所以在用ip sort後要再改 levels=hm 才符合需求
整個filter的條件如下
sort=host first=1 result_hosts_only=1 min_cvss_base= min_qod= levels=hm autofp=0 notes=1 overrides=1 rows=100 delta_states=gn
最近每次升級cacti都有問題
升到 0.8.8e 後原本正常的script output 竟然有個值不見了
到forum看看 已經有人反應了
http://forums.cacti.net/viewtopic.php?f=21&t=54856
只能再等了
無言
升到 0.8.8e 後原本正常的script output 竟然有個值不見了
到forum看看 已經有人反應了
http://forums.cacti.net/viewtopic.php?f=21&t=54856
只能再等了
無言
2015/07/07
今天接到一個工作
要把snort裡的資料匯出成文字檔給外面的單位
因為BASE沒辦法一次全部匯出
所以要自己寫sql了
select event.cid,signature,sig_name,inet_ntoa(iphdr.ip_src),inet_ntoa(iphdr.ip_dst),timestamp from iphdr,event,signature where event.signature=signature.sig_id and event.cid=iphdr.cid into outfile '/tmp/sqloutput.txt';
http://www.andrew.cmu.edu/user/rdanyliw/snort/acid_db_er_v102.html
http://sgros.blogspot.tw/2012/07/querying-snort-sql-database.html
http://note.tc.edu.tw/670.html
要把snort裡的資料匯出成文字檔給外面的單位
因為BASE沒辦法一次全部匯出
所以要自己寫sql了
select event.cid,signature,sig_name,inet_ntoa(iphdr.ip_src),inet_ntoa(iphdr.ip_dst),timestamp from iphdr,event,signature where event.signature=signature.sig_id and event.cid=iphdr.cid into outfile '/tmp/sqloutput.txt';
http://www.andrew.cmu.edu/user/rdanyliw/snort/acid_db_er_v102.html
http://sgros.blogspot.tw/2012/07/querying-snort-sql-database.html
http://note.tc.edu.tw/670.html
2015/07/05
2015/06/30
brocade fws 624 密碼忘記時的處理方法
Recover from a lost password.
1. Start a CLI session over the serial interface to the Brocade device.
2. Reboot the device.
3. While the system is booting, before the initial system prompt appears, enter b to enter the boot
monitor mode.
4. Enter no password at the prompt. (You cannot abbreviate this command.)
5. Enter boot system flash primary at the prompt. This command causes the device to bypass the
system password check.
After the console prompt reappears, assign a new password
Recover from a lost password.
1. Start a CLI session over the serial interface to the Brocade device.
2. Reboot the device.
3. While the system is booting, before the initial system prompt appears, enter b to enter the boot
monitor mode.
4. Enter no password at the prompt. (You cannot abbreviate this command.)
5. Enter boot system flash primary at the prompt. This command causes the device to bypass the
system password check.
After the console prompt reappears, assign a new password
2015/06/29
2015/06/28
最近想在8G的硬碟上裝linux mint
但安裝時會出現
說hd不夠大
為了解決這個問題找了一下資料
也不難處理
修改 /usr/lib/ubiquity/ubiquity/misc.py
min_disk_size = size * 2 # fudge factor.
為
min_disk_size = size * 1.1 # fudge factor.
再執行installer就ok了
http://forums.linuxmint.com/viewtopic.php?f=46&t=182642
但安裝時會出現
說hd不夠大
為了解決這個問題找了一下資料
也不難處理
修改 /usr/lib/ubiquity/ubiquity/misc.py
min_disk_size = size * 2 # fudge factor.
為
min_disk_size = size * 1.1 # fudge factor.
再執行installer就ok了
http://forums.linuxmint.com/viewtopic.php?f=46&t=182642
2015/06/26
好像愈來愈多人設定forword來把信轉到gmail去
導致因為信件量太多而被google擋了
一直出現
Jun 26 13:43:11 mail postfix/smtp[19923]: 4BB3B9E0624: lost connection with ALT1.ASPMX.L.GOOGLE.COM[64.233.168.26] while receiving the initial server greeting
Jun 26 13:43:13 mail postfix/smtp[19922]: 743E79E058A: lost connection with alt2.gmail-smtp-in.l.google.com[64.233.168.27] while receiving the initial server greeting
除了要求user不要再轉信而用pop3來收信外
想不出來有什麼方式可以解決了
查了一下google有提供轉發的服務
https://support.google.com/a/answer/2956491?hl=zh-Hant
再想看看要不要用
導致因為信件量太多而被google擋了
一直出現
Jun 26 13:43:11 mail postfix/smtp[19923]: 4BB3B9E0624: lost connection with ALT1.ASPMX.L.GOOGLE.COM[64.233.168.26] while receiving the initial server greeting
Jun 26 13:43:13 mail postfix/smtp[19922]: 743E79E058A: lost connection with alt2.gmail-smtp-in.l.google.com[64.233.168.27] while receiving the initial server greeting
除了要求user不要再轉信而用pop3來收信外
想不出來有什麼方式可以解決了
查了一下google有提供轉發的服務
https://support.google.com/a/answer/2956491?hl=zh-Hant
再想看看要不要用
2015/06/19
after cacti upgrade to 0.8.8d
zoom not working
Orz
wait for some days
someone find the problem and solved
download jquery-ui.js from https://jqueryui.com/download/
and put it into /cacti/include/js/
jquery-ui.js is missing from Cacti 0.8.8d tar.gz package.
This library is needed by jquery-zoom plugin.
This is the script load header from default cacti tree view :
<script type="text/javascript" src="/cacti/include/layout.js"></script>
<script type="text/javascript" src="/cacti/include/js/jquery.js" language="javascript"></script>
<script type="text/javascript" src="/cacti/include/js/jquery-ui.js" language="javascript"></script>
<script type="text/javascript" src="/cacti/include/js/jquery.cookie.js" language="javascript"></script>
<script type="text/javascript" src="/cacti/include/js/jstree.js"></script>
<script type="text/javascript" src="/cacti/include/js/jquery.zoom.js" language="javascript"></script>
<script type="text/javascript" src="/cacti/include/jscalendar/calendar.js"></script>
<script type="text/javascript" src="/cacti/include/jscalendar/lang/calendar-en.js"></script>
<script type="text/javascript" src="/cacti/include/jscalendar/calendar-setup.js"></script>
http://forums.cacti.net/viewtopic.php?f=21&t=54754
zoom not working
Orz
wait for some days
someone find the problem and solved
download jquery-ui.js from https://jqueryui.com/download/
and put it into /cacti/include/js/
jquery-ui.js is missing from Cacti 0.8.8d tar.gz package.
This library is needed by jquery-zoom plugin.
This is the script load header from default cacti tree view :
<script type="text/javascript" src="/cacti/include/layout.js"></script>
<script type="text/javascript" src="/cacti/include/js/jquery.js" language="javascript"></script>
<script type="text/javascript" src="/cacti/include/js/jquery-ui.js" language="javascript"></script>
<script type="text/javascript" src="/cacti/include/js/jquery.cookie.js" language="javascript"></script>
<script type="text/javascript" src="/cacti/include/js/jstree.js"></script>
<script type="text/javascript" src="/cacti/include/js/jquery.zoom.js" language="javascript"></script>
<script type="text/javascript" src="/cacti/include/jscalendar/calendar.js"></script>
<script type="text/javascript" src="/cacti/include/jscalendar/lang/calendar-en.js"></script>
<script type="text/javascript" src="/cacti/include/jscalendar/calendar-setup.js"></script>
http://forums.cacti.net/viewtopic.php?f=21&t=54754
訂閱:
文章 (Atom)